It is currently 20 Apr 2024, 00:08


New Topic Add Reply
Author Message
Post 31 Jan 2023, 11:38 • #1 
Master Guide
Joined: 07/26/21
Posts: 386
Location: North West Georgia
Hi Guys!

Another member was generous enough to sell me a yellow one piece Fenwick 84-5 blank. My plan is to ferrule the rod into either three or four sections and build it out as a pack rod for north Ga and NC trout fishing, or maybe occasional duty as a redeye bass rod. Overall, the blank is in good condition. The original markings are starting to rub off so Ill need to coat them to preserve them. Additionally, there is a small blemished spot about 13” down from the tip of the rod. It looks like it may have been partially crushed in this spot. Please see photo. It will likely be finished out with a home turned two digit fenwick style grip, a wood insert slide band real seat, and classic thread color choices. Ill be fine if it turns out anywhere between a 4 and a 7 weight.


At this point, my goals are to gather recommendations about ferruling this rod into 4 sections and if that is a reasonable goal, as well as recommendations for how to repair the damaged area in the tip if any repair is necessary. I have placed an internal stent before and that job seems to have been a success. However, it was in one of the mid sections on the rod not the very tip.


When it comes to repairing the damaged spot some of the ideas I have considered are – applying Super glue or some other product to that spot and letting it wick in, or placing a guide foot over that spot so that it gets wrapped, or placing wraps and epoxy thread finish over that spot sans guide foot, or attempting to install an internal stent in that spot. The stent seems like the surest repair, but the rod sure is skinny in that spot. Im not sure what the effect on the action would be like if I placed a stent so close to the tip. I do have material that I think will be about right for placing a stent there if that is the way to go. If I decide to place a stent to repair the damaged spot, Ill probably also choose to ferrule the rod into four sections. This will give me better access to place the stent since Id end up cutting the blank about 9” below the blemish. Thanks for reading and for any advice!


Top
  
Quote
Post 31 Jan 2023, 13:10 • #2 
Glass Fanatic
Joined: 07/05/10
Posts: 5229
Location: Mid Hudson Valley of New York
that's a tough one... can't tell from photo how deep the bruise/crack is. have you tried flexing it -- gently-- to see how the blank bends in that area?

Much depends on how deeply cracked it is, and the potential for the crack to spread under casting load and while fighting fish.

I think the surest fix would be an internal stent with an overwrap.


Top
  
Quote
Post 31 Jan 2023, 21:17 • #3 
Master Guide
Joined: 07/26/21
Posts: 386
Location: North West Georgia
Picketpin,
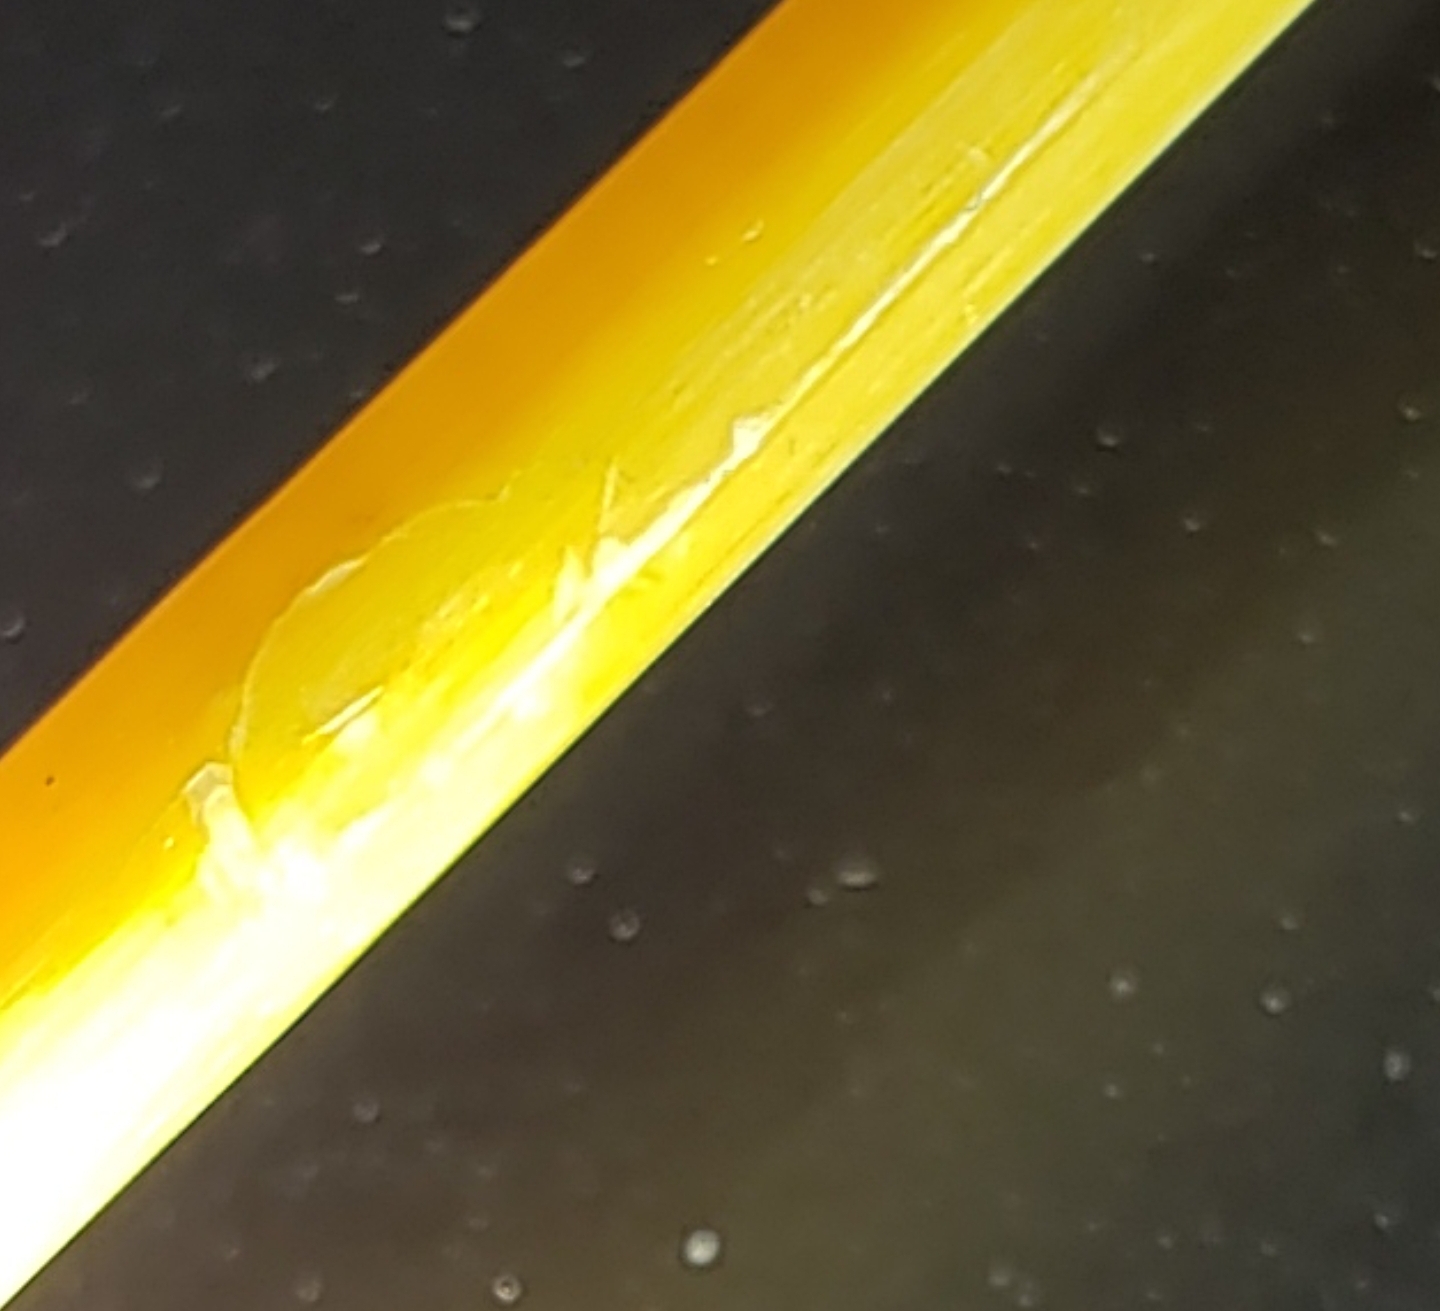
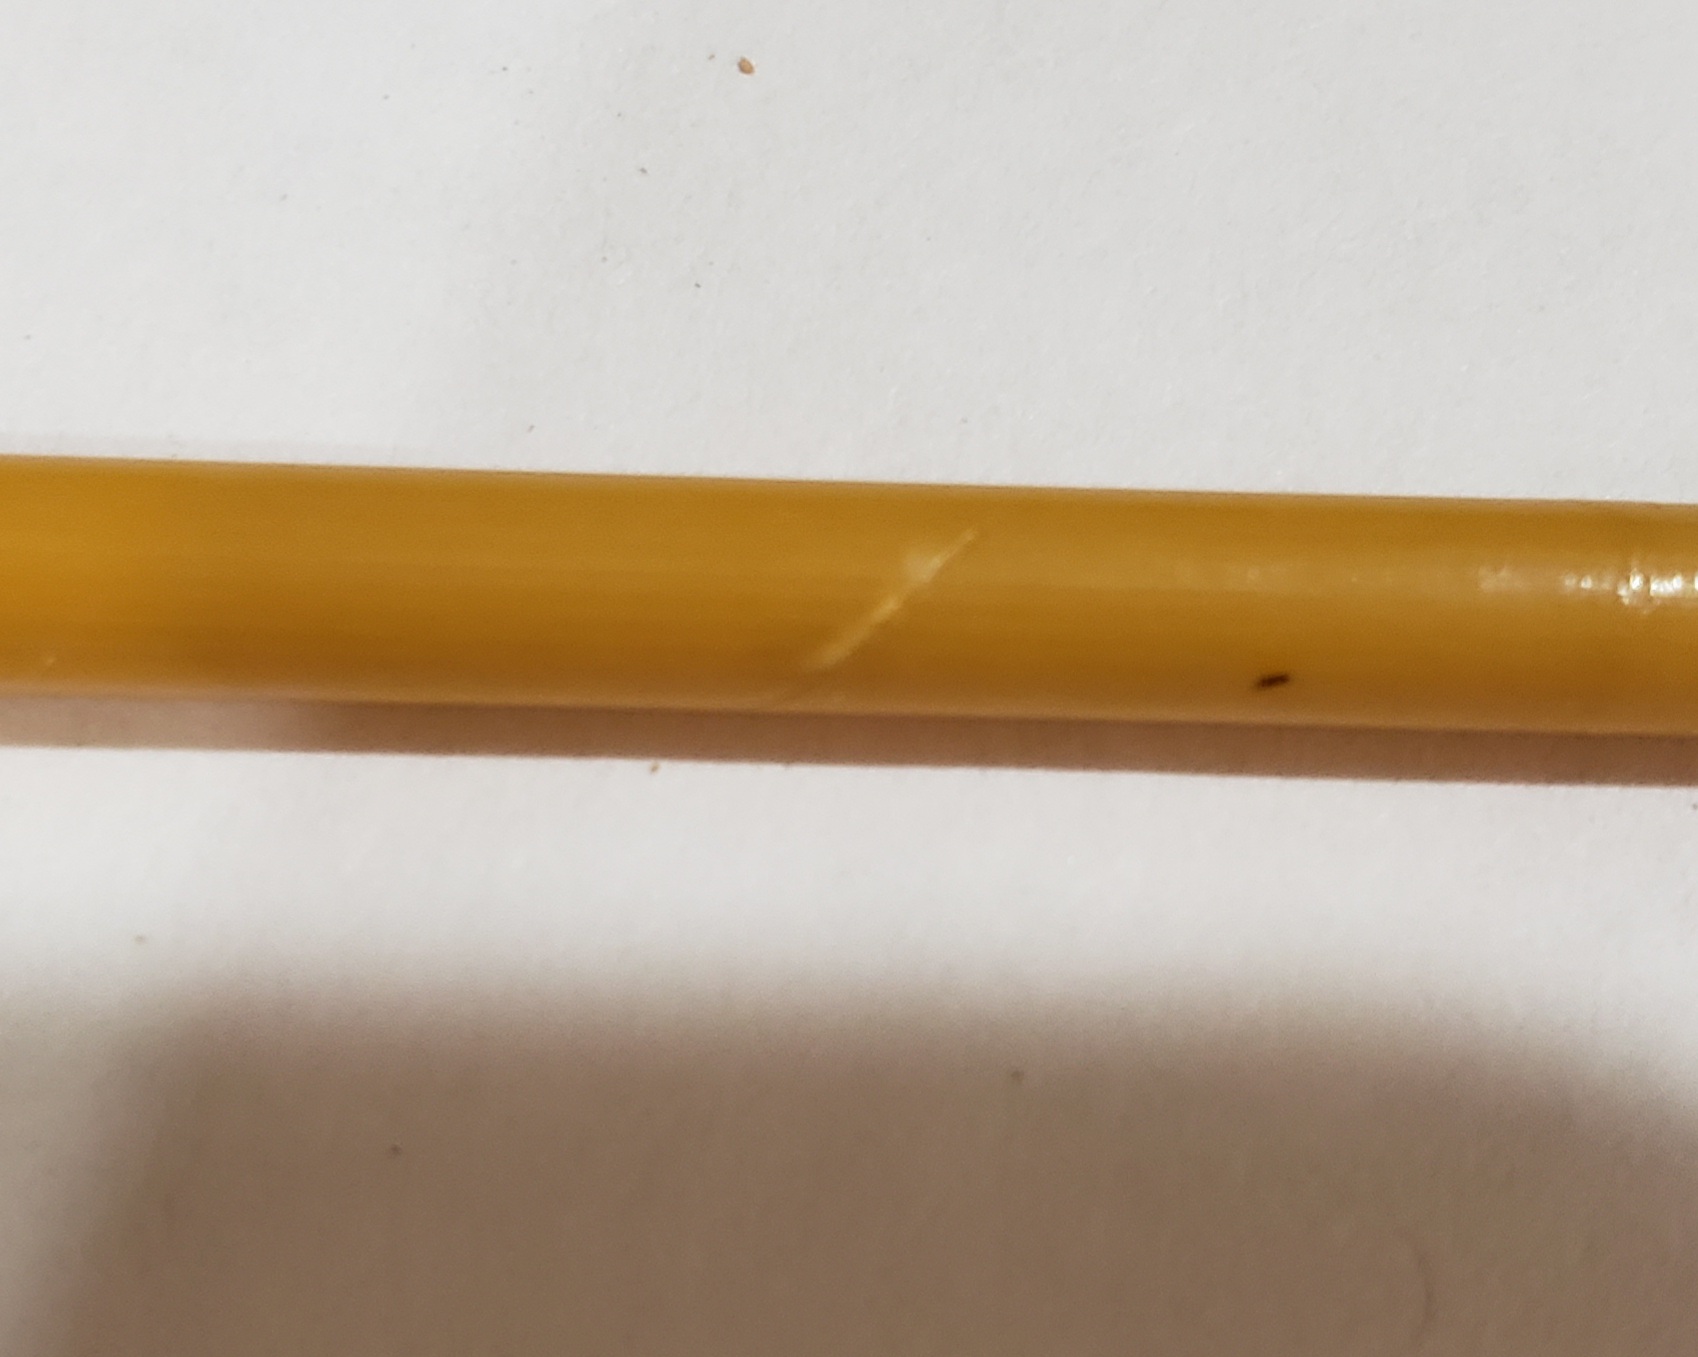
Thanks for the response. Oddly enough, the blank is fairly stiff overall, and this is especially true in the vicinity of the bruised spot.

I gave it a wiggle along side some other 7 foot fenwicks (all production rods) and it seems a good bit stiffer though that may just be a result of not having guides wraps or thread on it yet.

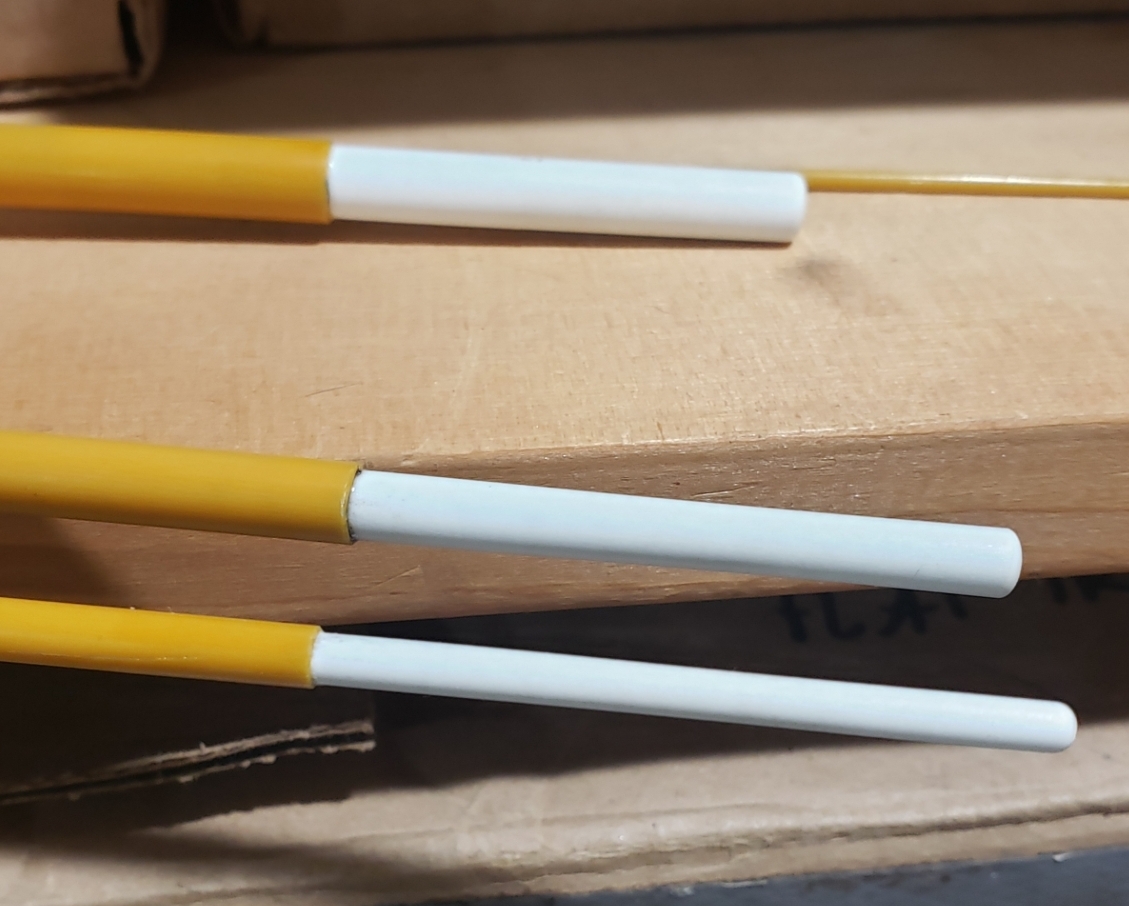
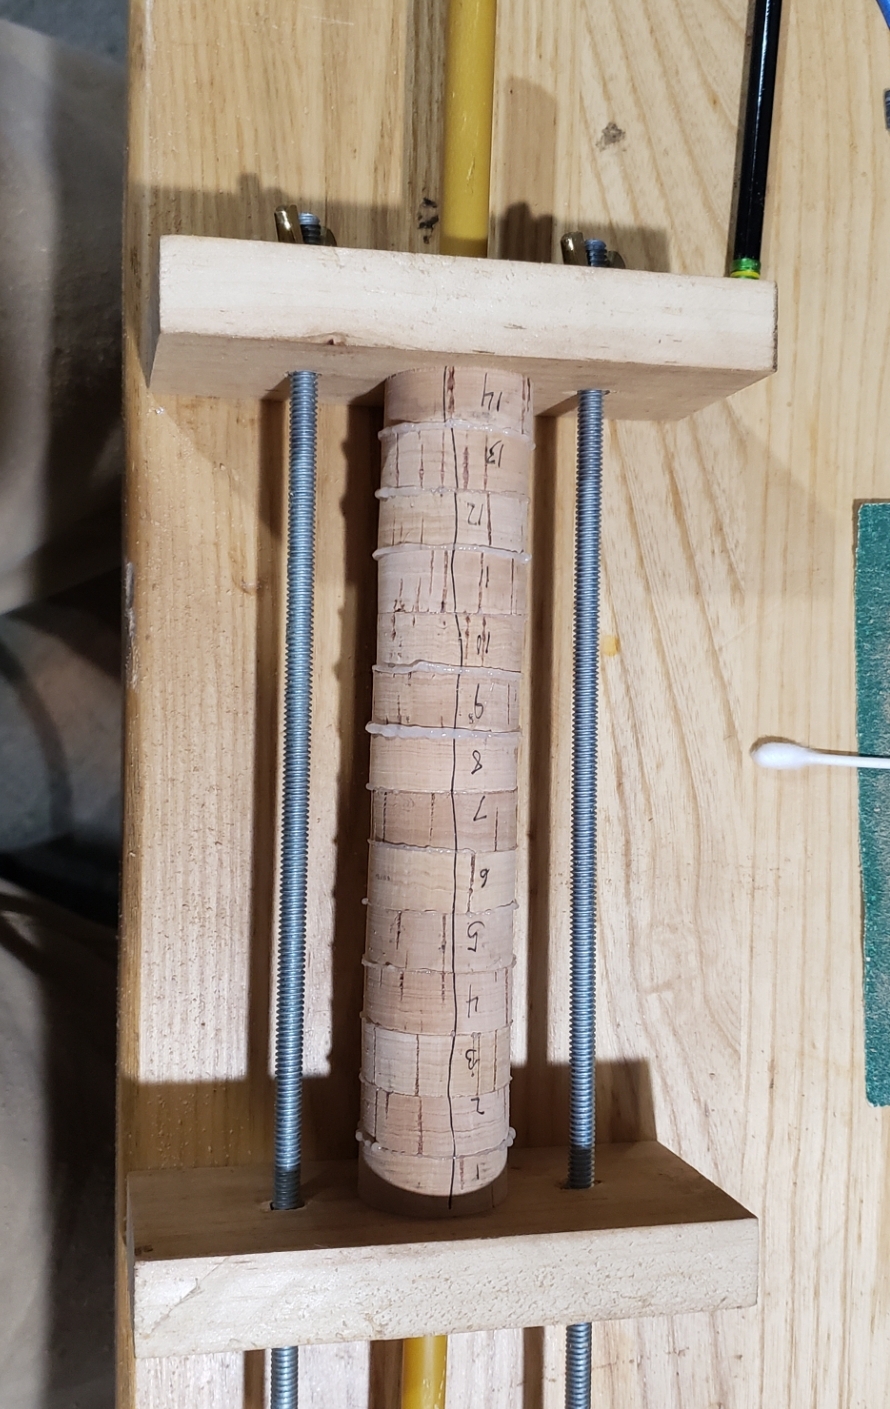
I just finished sectioning the rod into 4 pieces. I left an allowance for 2" spigots (stick out length). I made a mountain of a mole hill about how hard sectioning the blank would be. About half an hour of careful work with a tape measure, a jewelers saw and some 400 grip sand paper did the job well.

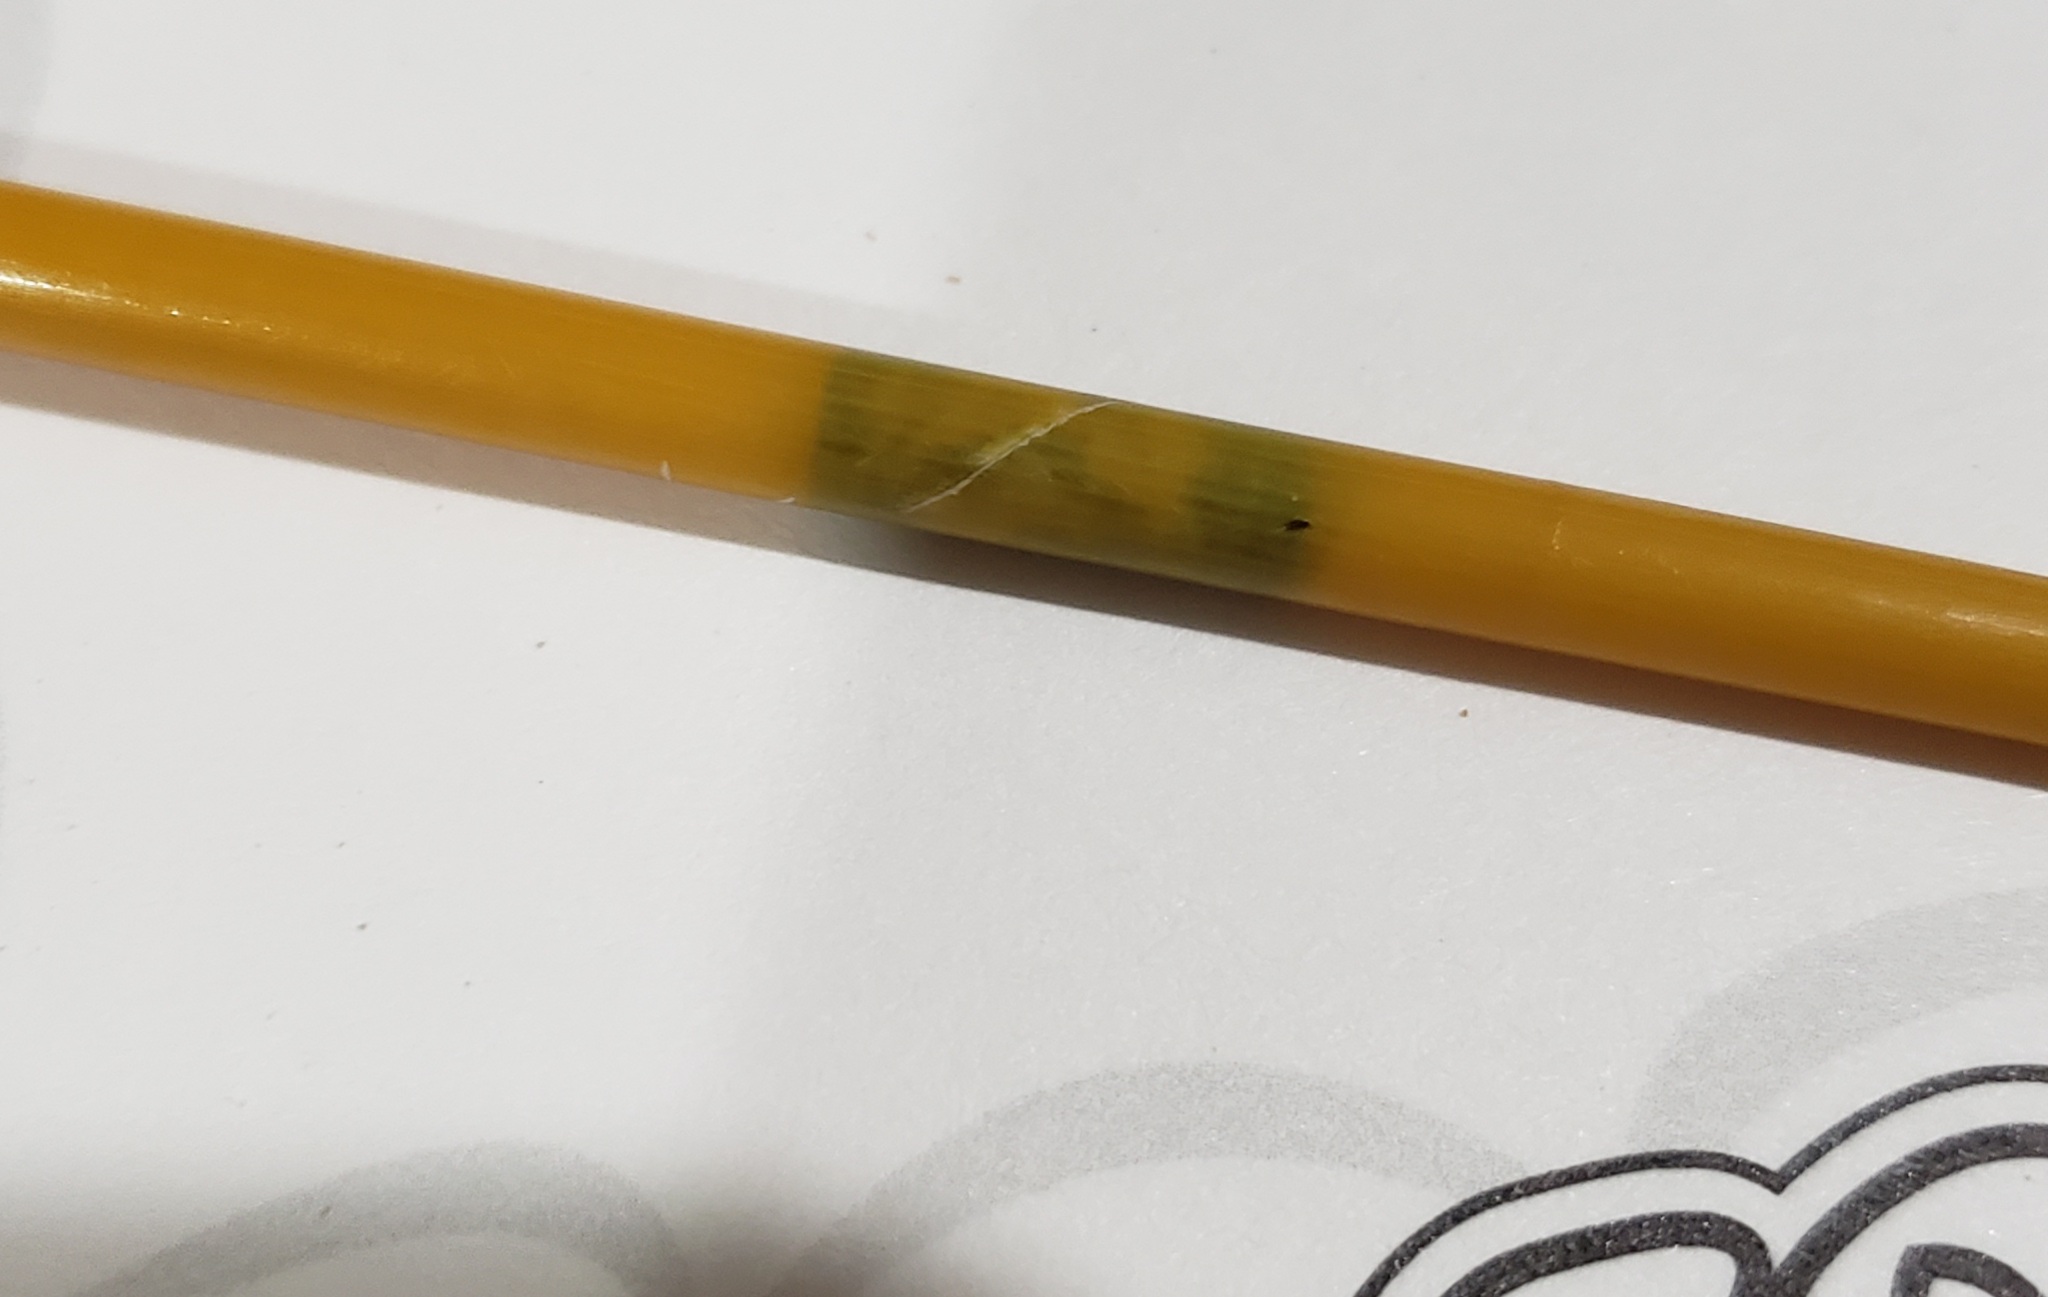
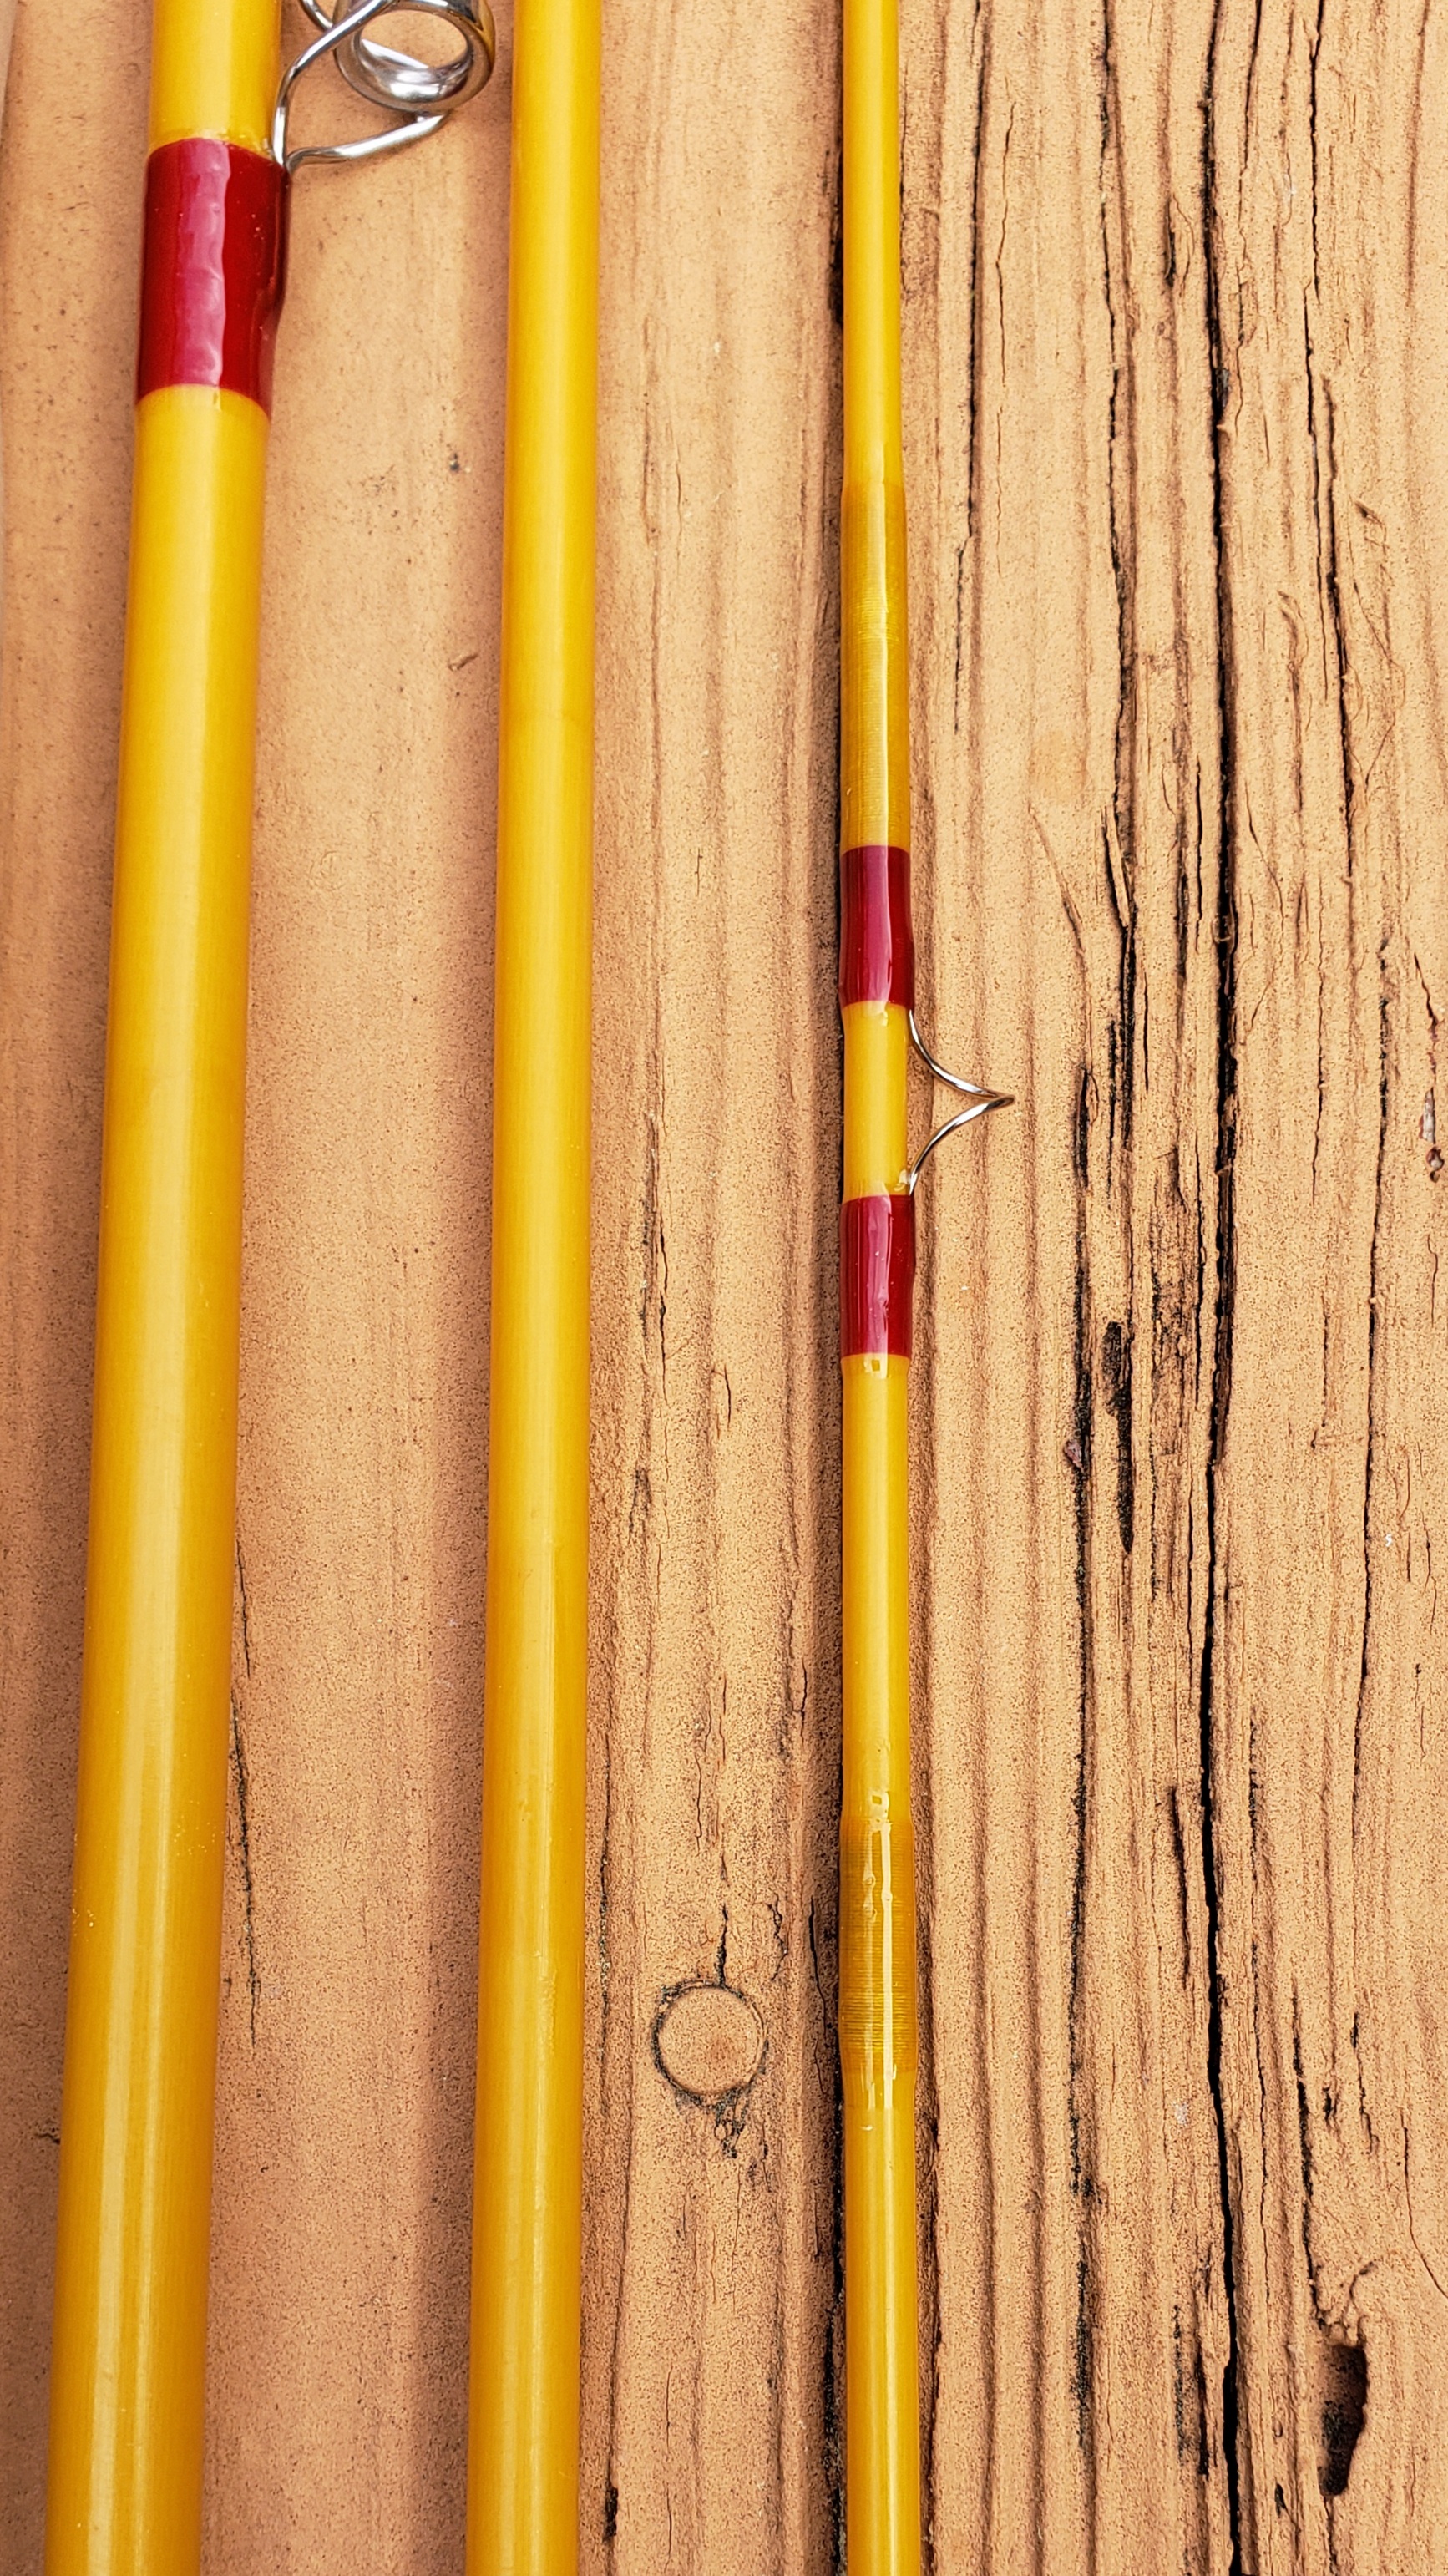
Now I have a better idea of the dimensions for a stent if I place one. Based on the ID and OD of the blank at the female end of the tip section and the OD at the point of the bruise, I think Im looking at a stent in the neighborhood of 0.108" in diameter. I just so happen to have a tip section from a CGR rod that matches these dimensions. Ill work on getting it stripped and ready tonight, then Ill probably need to throw in the towel for the night.

Edit: I got a little carried away and got the stent fitted to the bruise. Based on my measurements of the blank I had a rough idea of the diameter I needed for the stent. I found a spot on my donor rod about 0.010" larger than that, and cut donor rod in that location. I then sanded the area towards the butt end of the donor piece aggressively so it would not interfere with the inside of the fenwick tip section. This allowed me to use the whole rod section to poke the soon-to-be stent in and out for careful test fitting and gentle sanding. Adter I was satisfied with the fit, I marked the donor piece with painters tape to show the depth that the donor piece needed to be pushed into the fenwick tip. Then, I cut the last inch or so of the donor piece off to become the stent.

Now all I have to do is apply epoxy to the stent and use the remainder of the donor piece to push the stent in until I reach the blue tape. I couldnt find any 30 minute epoxy at the house so this job will have to wait for tomorrow.


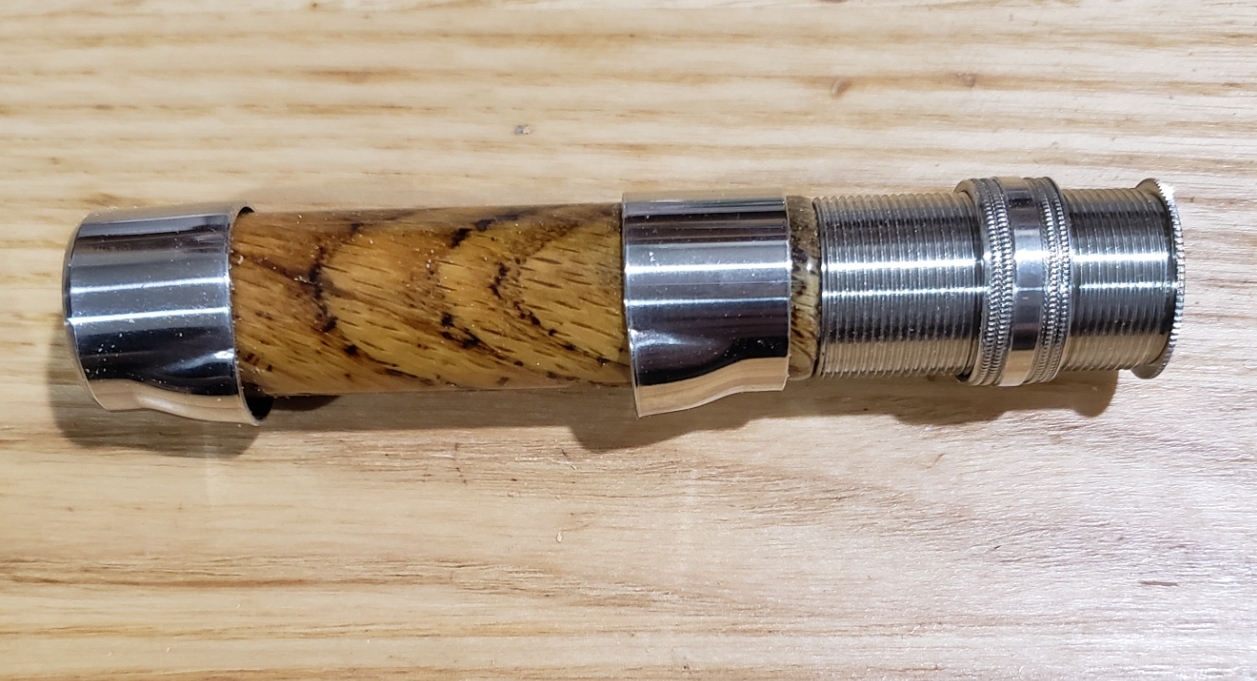
For anyone who is curious, the butt of the 84-5 measures 0.427" and the tip is a 5. Ive already ordered a reel seat from Ray Lee.


Top
  
Quote
Post 31 Jan 2023, 22:49 • #4 
Glass Fanatic
Joined: 12/31/15
Posts: 1248
Location: Northern Rockies
This is really great. Fantastic work. I hope you didn’t order the Ray Lee seat I had my eye on, though.


Top
  
Quote
Post 31 Jan 2023, 23:38 • #5 
Glass Fanatic
Joined: 07/05/10
Posts: 5229
Location: Mid Hudson Valley of New York
BB
You're off to a great start. Glad you got the stent fitted. The stent will add mass to and increase the stiffness of the tip section. Might make the two mid sections lighter and softer by comparison. Interested to hear from you how it turns out, the action, and line weight that makes it sing.


Top
  
Quote
Post 01 Feb 2023, 09:54 • #6 
Master Guide
Joined: 07/26/21
Posts: 386
Location: North West Georgia
Thanks guys! Hopefully Ill get the stent placed tonight. Spigot material is ordered from goodwinds. The member who sent me the blank included a solid fiberglass rod that I initially planned to use to make the spigots, but it turns out that the rods lower section is natural colored glass under the paint while the upper section is tobacco glass under the paint. Since I would have needed material from both to make the spigots I decided to order material and have it consistent. The solid glass sections are sure to come in handy though. Id be very excited to ferrule a rod with the tobacco glass portion, its pretty stuff.

The reel seat I ordered is a downlocker with a 0.435 bore. I havent noticed a down locker on Rays ebay store before, so Im guessing it may be a new product. Normally Id like a slide band on a 7' trout rod, but the fenwick factory rods normally had down locking seats and I wanted to pay homage to that. It certainly made it easy when I found such a pretty one from Ray. If the rod ends up liking a heavier line, I may be glad to have the locking seat. Hopefully Ill get guides, tip tops and thread on order today.


Top
  
Quote
Post 03 Feb 2023, 13:13 • #7 
Glass Fanatic
Joined: 01/02/12
Posts: 1861
Location: Gig Harbor, WA
Good job on the cutting. I had a “spare” FL84 2pc that I made into a 3pc, using tobacco glass for ferrules. Doesn’t look too bad and does make it easier for traveling.


Top
  
Quote
Post 04 Feb 2023, 22:00 • #8 
Master Guide
Joined: 07/26/21
Posts: 386
Location: North West Georgia
Thanks! That sounds like a neat rod, do you have any photos?

I finally pushed the stent in today.

As far as I can tell, that job went off without a hitch. The stent is just where I wanted it to go. A small amount of epoxy wept through the bruised spot. I wiped it off carefully.

I did find one more thing to think about:

This is a blemish on the blank that I assume is from the factory. It is about 4" lower on the tip section than the original bruise. I originally assumed it was cosmetic. Unfortunately, when I pushed the stent through this spot, epoxy bled through this spot, making it a crack. At this point Im not really sure what to do with it. On the one hand, I could place another stent. It would only need to by 3/8 long. I can overwrap with thread. It already has epoxy in the crack. On the other hand, Im not sure if its worthwhile to go into a build on a blank that has two stents in the tip section.

What would you guys do here?


Top
  
Quote
Post 04 Feb 2023, 23:28 • #9 
Glass Fanatic
Joined: 06/23/05
Posts: 4971
Location: US-MT
I'm embarrassed that blank has TWO bad spots. I'd be happy to refund your $$. Message me if need be.

Glass is a weave of fabric, and they ooze glue through it to make the blank originally. So oozing epoxy (I usually use superglue) through questionable spot is usually a good repair.


Top
  
Quote
Post 13 Feb 2023, 15:06 • #10 
Master Guide
Joined: 07/26/21
Posts: 386
Location: North West Georgia
Hi guys, I wanted to give everyone an update. Majicwrench insisted on refunding me for the blank. He is a stand up guy, and I want to be sure that everyone knows it.

As for the rod, I pushed in the second stent last night. I plan to move ahead with the rod build. I have the reel seat in my pocket to work on after work today, the threaded portion is a little long for my taste at about 4.2" overall. Ill be taking 0.300" off.


Edit:
Hi Guys – I wanted to give an update on the build. Ive placed all three of the ferrules. I made them from solid stock from goodwinds. I made them by chucking the pieces in the drill press and sanding down to rough shape with 120 grit, then chased up through 400 grip. I found it very helpful to take measurements of the blanks OD then subtract wall thickness to develop some idea of the ID and internal taper of the blank. I found that a ~ 0.001” interference fit was about right for the male portion of the ferrule. It took me seven total attempts to produce the three ferrules. I eventually settled on a policy of getting the fit into the tip section just right in the drill press, then carefully hand sanding the portion of the ferrule that fits into the butt section. Ferrules were set with 30 minute devcon.

I got the grip glued up. Ill shape the grip to mimic the profile of a two digit Fenwick, my favorite grip shape. As for thread colors, Im thinking crimson or candy apple as the primary color with gold as a trim color. I am considering a decorative wrap of butchers twine near the grip. My current plan is to overwrap the ferrules for the full length that they are inserted into the tip section. Ill probably mimic that length of thread wrap on the butt section of the ferrule as well.


Based on looking at the guide spacing on some of my other 7’ 4 section rods, it looks like some of the guides will need to go fairly close to the female sections of the rod sections. Im planning on wrapping about 1-3/4” at each ferrule, how would you guys handle situations where a guide needs to go in that portion of the blank? Is it best not to place guides over spigot ferrules? Thanks for Reading!


Top
  
Quote
Post 15 Feb 2023, 10:10 • #11 
Glass Fanatic
Joined: 06/23/05
Posts: 4971
Location: US-MT
Looks good.
Doesn't really matter, but I wouldn't wrap the whole length of spigot, that's a lot of thread, and everything weighs something. And by all means put guides in the ferrule wraps, kill two birds with one stone.


Top
  
Quote
Post 15 Feb 2023, 15:49 • #12 
Glass Fanatic
Joined: 01/02/12
Posts: 1861
Location: Gig Harbor, WA
Brookie boy, pics as requested. You can see the wrap on the middle section where the original ferrule was. Moving from a 2pc to 3pc does’t seem to have added any “stiffness” to the action as I would have expected. The 2pc does seem physically lighter in hand. They both weigh 2.6oz on my digital scale. For me, adding portability was worth the exercise. Roy


Top
  
Quote
Post 18 Mar 2023, 17:24 • #13 
Master Guide
Joined: 07/26/21
Posts: 386
Location: North West Georgia
Keith, thanks for the advice on ferrule wraps. Ill try to keep them minimal and wont sweat placing guides over them.

Roy, thanks for the photos! That seems like a cool project. Im a sucker for multi section rods. Even if Im just riding in a car, a two section rod can seem cumbersome.

I made a little bit of new progress on the rod. I turned the grip and got the reel seat glued on. At this point Im waiting for a few more thread color choices to come in the mail. Ill keep you guys up to speed!


Hi guys! My work schedule has been 6x12 for a while, but I finally finished this rod up and took it out for some yard casting. While I cant tell you what it would have cast like as a one or two section rod, I can certainly say that it is a limber 4 section rod with no obvious casting issues. I cast it along side my FF70-4 and FF756-4, Id say it is more similar to the FF70-4 but a tad lighter and quicker. A DT6 peach was a little heavy, but a rio gold 5 felt about right. I suspect it will cast well with any of the half line weight heavy wf5 lines. By raw luck, the thread wraps all but concealed the stent repairs. The last photo shows both stents, but youll have to look for them. The 3rd section is about a quarter inch shorter than the others, I took some material out to tighten up a ferrule and make some gap adter the epoxy set. All in all, I think its a structurally sound and fairly handsome small stream 5 weight pack rod. Mission accomplished. Hopefully I can update you guys soon with a few fishing photos.


Top
  
Quote
Post 22 Mar 2023, 11:13 • #14 
Glass Fanatic
Joined: 01/02/12
Posts: 1861
Location: Gig Harbor, WA
Well done! The completed rod looks just great. You should be pleased with yourself having completed such a project. Roy


Top
  
Display posts from previous:  Sort by  

New Topic Add Reply


Who is online

Users browsing this forum: No registered users and 14 guests


You cannot post new topics in this forum
You cannot reply to topics in this forum
You cannot edit your posts in this forum
You cannot delete your posts in this forum

Jump to:  
Google
Powered by phpBB® Forum Software © phpBB Group