It is currently 25 Apr 2024, 02:54


1, 2  Next New Topic Add Reply
Author Message
Post 28 Jan 2020, 01:11 • #1 
Administrator
Joined: 01/10/06
Posts: 7824
Location: Holly Springs, NC
Quote:
Frustratingly, despite being careful I bored out the tip end of the grip channel a little too much, perhaps a millimeter extra...
With a pre-formed cork grip and a file/reamer it is very, very easy for this to happen. This issue has popped up a couple times on the forum lately. So, how do you avoid over reaming? Remember shop class? Measure twice and cut once. But how do you accurately measure a hole inside a piece of cork? I recommend a dial caliper.

If the rod building bug has it's fangs deeply into your free time, you need one good piece of precision measuring gear - a dial caliper. Go to eBay and find a dial caliper that will measure to 0.001" (0.02 mm for the metric crowd). Don't buy a digital - they eat batteries and will die when you need it most. A dial caliper will keep working and working and working... While there are some good used calipers on eBay, there are lots of damaged goods too. Buy new in the box, preferably with instructions. They are available in the $20-30 range new from Asia. The General Tools model #145 works too (fiberglass filled plastic - what's not to love?).

Measuring the hole in a cork grip: Photo 1 shows a caliper with the pertinent parts labeled (sorry, I bought my calipers when I was 20 and still had great eyesight. The photos show vernier calipers. Buy a dial unit). Mark your rod blank with blue tape where you want the cork grip to end. Photo 2 shows how to measure the blank diameter - use the tips of the outside jaws and measure up against, but not over, the tape. Write down the measurement! Now set the caliper for 0.050" less than the measurement. Lock the caliper. Use the inside caliper jaws to track how close the hole diameter is to the blank measurement (see Photo 3). Once the inside jaws slip into the hole (within 0.050" of your target size) finish the large end of the grip then change to a finer grit reamer. Reset the caliper to 0.010" less than the measurement. Continue reaming until the inside caliper jaws just slip into the hole. You should be able to push the slightly undersize grip over the rod blank, even dry. From this point be very cautious with your reaming.

BigspacePhoto 1BiggerbigspacePhoto 2BiggerbigspacePhoto 3

What else can we do with a dial caliper? You can measure thread wraps by sliding the outside jaws up against the threads (see Photo 4). You can accurately measure the rod tip so you can buy the proper size tip-top (see Photo 5). Note, here I use the main part of the outside jaws, not the tips. You can measure tippet material the same way. You can measure rod ferrules (see Photo 6). You can measure snake guide heights the same way. The other end of the caliper has a depth rod (see Photo 7) that is used to measure the depth of holes and cavities (see Photo 8). The back of the caliper has a step that can be used to measure ledges and steps (see Photo 9).

BigspacePhoto 4BiggerbigspacePhoto 5BiggerbigspacePhoto 6


BigspacePhoto 7BiggerspacePhoto 8BiggerspacePhoto 9

Two other recommended tools while I'm at it (see Photo 10). First, 3M blue tape with the orange core. This tape is made for recently painted surfaces. It sticks even less than standard 3M blue and leaves less goo behind. Second, a cheap, digital scale that runs on AAA batteries. This one measures 0-500 g with a display to 0.1 g. The display can also be set to grams, ounces, and grains. I've checked mine against calibrated lab weights. From 0.5-500 g it measured to better than 0.1% accuracy. That is pretty nice for $10-15. I use mine for weighing finished rods, rod components, reels, fly lines, and fly tying materials such as beads and jig heads. And epoxy. I weigh both parts of the epoxy onto aluminum foil, then mix. In my opinion, this is easier than measuring by volume.

BigspacePhoto 10

Tom


Top
  
Quote
Post 28 Jan 2020, 09:41 • #2 
Piscator
Joined: 08/10/05
Posts: 19109
Location: downtown Bulverde, Texas
Gunsmithing screwdriver set - this basic $15 Wheeler Engineering set has done everything I needed for 15 years (with the addition of bits here and there).
Image
Adding good miniature screwdrivers will cost a bit more - this Wiha set is pretty perfect
Image

here's the difference between a cheap tapered and good hollow-ground screwdriver

Image
1 - hollow-ground screwdriver blade
2, 3 - cheap tapered screwdriver
4 - cheap tapered screwdriver at work
5 - damage produced by cheap tapered screwdrier
6 - hollow-ground driver at work

a $3000 (OP's) reel that had seen the wrong drivers before I saw the reel - did my best to dress up those handmade screw heads
Image Image


Top
  
Quote
Post 28 Jan 2020, 14:26 • #3 
Master Guide
Joined: 02/01/12
Posts: 903
Location: Upstate NY
Tom,
You mention using a scale to weight out the resin and hardener. With any 2 part Epoxy, either bonding or finish epoxy, equal volumes will weight different amounts, so you would first need to know how much weight a certain volume is of each part. Once you know what a certain volume weights, yes a scale can be much easier to use.
I use a scale to measure out my Finish 2 Part Epoxy, it is very simple, but I did have to weight out 3cc of each part and it is going to be different with regard to brand of finish, while the weight differential was slight, it is enough that you don't want to go just off one brand and think it will be okay for any brand.


Top
  
Quote
Post 28 Jan 2020, 16:16 • #4 
Piscator
Joined: 08/10/05
Posts: 19109
Location: downtown Bulverde, Texas
I work with a Lot of epoxies - we embed all our metallography specimens. Some to cure today, some to cure tomorrow.
An example I can give you is embedding a length of wire rope in lucite tubing and curing epoxy through it before cutting.
One epoxy we use for low viscosity wetting is 3 parts hardner to 25 parts resin by weight, etc.
Image

oh yeah, on topic - wire bending pliers - they have a lot of uses from shaping reel springs to making home-made spinners.
(the phosphor-bronze sheet was cut with a hand press-brake)
Image Image
and yes, as Tom mentions below, every type of epoxy we have in the lab has the mix ratios written on both bottles in sharpie...

editing for another response below, it's very easy while reading a scale to Accurately pour two parts of epoxy into the one disposable plastic cup you're going to stir with a popsicle stick, and the example I gave above is 22:5 by volume. If you don't get it right, the epoxy doesn't cure, or it boils.


Last edited by bulldog1935 on 28 Jan 2020, 17:48, edited 5 times in total.

Top
  
Quote
Post 28 Jan 2020, 16:17 • #5 
Administrator
Joined: 01/10/06
Posts: 7824
Location: Holly Springs, NC
wjude wrote:
Tom,
You mention using a scale to weight out the resin and hardener. With any 2 part Epoxy, either bonding or finish epoxy, equal volumes will weight different amounts, so you would first need to know how much weight a certain volume is of each part. Once you know what a certain volume weights, yes a scale can be much easier to use
Yes, that is correct. The first time you use a new product, measure by volume and weight and write down the measurements. Perhaps I should have included a small notebook and a calculator in the list of tools too...

For the people that hate math, here is an example. Let's say we are using JGEFLEX WONDERPOXY. The instructions recommend mixing 1:1 by volume. The bargain priced JGEFLEX EASYKIT came with a large bottle each of part A and part B, and a pair of 3 mL plastic syringes to measure with.

Set up the scale with a small container to receive the WONDERPOXY. Zero the scale (the zero button may be marked 'Tare'). Fill one syringe with 3.0 mL of part A and squirt it into the container. For this example let's say we measured 3.5 g. Zero the scale again, fill the other syringe with 3.0 mL of part B and squirt it into the container. Let's say we measured 2.5 g. Now mix the epoxy and apply it to your rod project.

Calculate the ratio of part A to part B. In this case I set up the equation for weighing part A first and calculating part B:


The next time, set up a container to receive the WONDERPOXY mixture. Zero the scale, then add some part A to the container. Let's say we added 2.0 g of part A. For every gram of part A, we should have 0.71 grams of part B. In this case measure out 1.4 g of part B (slowly so you don't overshoot). Mix and apply.


Once you have the ratio determined, write the ratio in Sharpie on the original containers. Your nephew or granddaughter probably stole your small notebook and calculator when you weren't looking.


Tom


Top
  
Quote
Post 28 Jan 2020, 17:22 • #6 
New Member
Joined: 10/09/16
Posts: 16
Location: US-NC
Why weigh your epoxy when you can just mix it by volume (like I would assume 99% of builders do)? Over the years I've mixed more epoxy than I can remember and I've never felt the need to weigh it or do math to mix two equal parts. What am I missing?


Top
  
Quote
Post 28 Jan 2020, 17:50 • #7 
Piscator
Joined: 08/10/05
Posts: 19109
Location: downtown Bulverde, Texas
good lab protocol works equally well in the shop and shouldn't threaten the shop steward.


Top
  
Quote
Post 28 Jan 2020, 18:14 • #8 
Administrator
Joined: 01/10/06
Posts: 7824
Location: Holly Springs, NC
If you prefer to measure by volume, then by all means do so. I'm not saying that doesn't work.

First off, I'm cheap. Rod finishes usually come in separate bottles. I measure onto tin foil, mix with a toothpick, use, and throw away the foil. No clean-up needed. No need to buy extra measuring syringes, spoons, or cups. Those measuring items are plastic. I don't wish to use plastics with epoxy - but that is a personal preference.

Second, epoxy isn't as safe as we all think. When measuring by weight I only handle each part once as I expel it onto the foil. Comparatively speaking, measurement by syringe is a mess. The less epoxy I get on me, the less likely I will have an allergic reaction. The late Dave Lewis did gorgeous epoxy work - until he developed a nasty allergy. After that, he did really gorgeous work with spar varnish.

I buy 5-min epoxy in the dual-syringe unit. The unit expels the proper amount of each part at the same time. I expel that onto tin foil, mix, use, and discard the rest. Again, no mess and no extra materials needed.


Tom

Complete disclosure here. I've been a chemist for 40 years. I've found it is much more precise to work by weight than volume. And with sticky viscous liquids, it is cleaner to work by weight than volume. Your experiences may vary. If I could only buy one new tool for the shop - it would be the dial caliper...


Top
  
Quote
Post 28 Jan 2020, 18:50 • #9 
Glass Fanatic
Joined: 03/16/08
Posts: 3543
Location: Upstate-NY
I only use 2-part epoxy to affix cork handles or wood seats to the blank, but I typically “eyeball” the proportions.

probably a bit to0 cavalier, but haven't had a grip or seat fail yet, so...


Last edited by corlay on 29 Jan 2020, 10:14, edited 1 time in total.

Top
  
Quote
Post 28 Jan 2020, 19:15 • #10 
Glass Fanatic
Joined: 02/26/14
Posts: 3588
Location: US-MN
I've only been a chemist for 22 years, 30 if you allow me to include all the schooling and I agree with Jgestar and Bulldog that good laboratory practice mandates that you weight out vicious liquids instead of using volume...... but at home building a rod, I use Corlay's method of eyeballing it.

I agree with the caliper too, I added that this year and now find it invaluable.


Top
  
Quote
Post 28 Jan 2020, 19:32 • #11 
Piscator
Joined: 08/10/05
Posts: 19109
Location: downtown Bulverde, Texas
And all good home-use commercial epoxies are formulated that way (and if you think about it, the balance is made up with inert materials) - No industrial epoxies are formulated that way.
Tom is entirely correct, it's wasteful and messy to try measuring by volume, while measuring by weight into the same container is foolproof.
I always have Z-poxy around home, and you squeeze out two equal beads on your mixing card.
Couldn't imagine life without calipers - my vernier calipers are buried somewhere in preference to a good inexpensive dial caliper.
Even electronic calipers can be found inexpensively these days, giving the metric/imperial choice with the touch of a button.


Last edited by bulldog1935 on 28 Jan 2020, 19:41, edited 1 time in total.

Top
  
Quote
Post 28 Jan 2020, 19:37 • #12 
Glass Fanatic
Joined: 03/16/08
Posts: 3543
Location: Upstate-NY
Essentials:
vernier calipers
x-acto knife
burnishing tool
wrapping jig (home-made)
bench vice
chordless drill
lighter (or alchohol burner)
artist’s brushes
spar varnish
mineral spirits
2-part epoxy
acetone
gorilla glue
sandpaper
rat tail file
isopropyl alchohol
paper towels
cotton rags
scissors
ruler
hack saw
pliers
masking tape

Luxuries:
rod turner
caligraphy pen
india ink
sand turtle gleemer
perma blue
color preserver
magnifying glass
drying cabinet
lathe


Last edited by corlay on 29 Jan 2020, 09:13, edited 1 time in total.

Top
  
Quote
Post 28 Jan 2020, 19:58 • #13 
Glass Fanatic
Joined: 02/27/16
Posts: 2334
Location: US-IL
Anything water based for rod building?Can't take anymore epoxy exposure.Spent years of my life wallowing in that crap.Solvent based products are getting to me too but in small quantities and air flow not to bad.A person in my area can pick up high end machinist tools for next to nothing used.Unfortunately all the people that know how to use them are dying off.I have so many tools and gadgets and multiples of many.


Top
  
Quote
Post 28 Jan 2020, 23:07 • #14 
Administrator
Joined: 01/10/06
Posts: 7824
Location: Holly Springs, NC
Yes, there are some water based finishes. Mudhole lists 3-4 products on their epoxy and finishes webpage. I used to use a Gudebrod, one part, water soluble rod finish. Lately I've been using spar varnish.

Water based finishes get a bad rap on fishing forums because everyone thinks they dissolve in water (they don't). Water based varnishes are extremely fine particles of varnish dissolved/suspended in a mixture of water and a water soluble solvent. As the water evaporates off the coating, the solvent dissolves the particles and melds them into a single layer. Then the solvent evaporates, leaving a clear finish behind. The photo below is a rod I built with the Gudebrod product 15 years ago. For a blank that dark, I should have painted a light color under the wraps. The finish is still clear and hard.

Corlay, good list of rod building tools! I would include a spool of tippet or Firewire to use as thread pulling loops. I've broken too many loops when I used size A thread. And a bottle of brush on superglue.


Tom


Top
  
Quote
Post 29 Jan 2020, 00:14 • #15 
Sport
Joined: 01/13/12
Posts: 80
Location: US-NC
i finally had a bad mixture of epoxy finish after years with no problems(i'm a hobby builder, not a pro). going to have to strip everything back off, clean and redo whole rod. it's an ugly, unsightly mess. better procedure is called for on my end for sure. thinking of getting a scale to ensure proper measurements.


Top
  
Quote
Post 29 Jan 2020, 02:02 • #16 
Administrator
Joined: 01/10/06
Posts: 7824
Location: Holly Springs, NC
Run a test batch on a dowel or some scrap rod first. Batches of epoxy have been known to go bad - even fresh from the store.


Tom


Top
  
Quote
Post 29 Jan 2020, 07:14 • #17 
Glass Fanatic
Joined: 02/26/14
Posts: 3588
Location: US-MN
Great list Corlay!


Top
  
Quote
Post 29 Jan 2020, 09:43 • #18 
Glass Fanatic
Joined: 04/26/06
Posts: 3837
Location: Northeast Of Heaven
Hello
12' Measuring Tape.
Pencil.
Pair Of Magnifying Glasses/Safety Glasses.
Latex Gloves For Handling Epoxy.
Dremel Tool & Bits.
Paper Towels.
A Tape Dispenser.
Cork Reamers,
All Sorts of Grits of sand paper for shaping cork,polishing,etc.
Wrapping fixtures/Thread work stations.
Good Lighting/the best you can afford.

If Your Going For The Gusto

Epoxy Mixer.I was given this as a gift,never would have purchased one,turned out to be one of the best additions to my shop,wouldn't apply epoxy to a rod unless it's mixed in the mixer.

Spine Finder. also a gift, I do a better job finding the back bone by feel,but if your not sure how to locate the back bone a must.

Bench Grinder.
Bench Sander.
Drill Press.
Dedicated Metal Lathe.
Dedicated Wood Lathe.
Cork Smithing Lathe.

Drill Bit Index.
Various Metal Cutters and Reamers.
Stones For De-burring and Polishing.
Dial Indicator.

Dip Tubes.

Finish/Clean Room & Drying Cabinet.
Finish Storage Cabinet/Flammable Materials Storage.
Good Ventilation,De-humidification Maintain Dew Point.

Proper containers for thread storage is very important,thread should be kept in sealed containers,or thread safes.
Exposure to light,moisture,insects,dust,dander,dirt. all have varied detrimental effects on your thread.

Used to keep the majority of my threads in spool racks where I could see what I had on hand to help in choosing colors and combinations.Over time I started to notice my thread was getting ruined from exposure. now most is under wraps.
Like the plastic storage boxes you can get where they sell sewing materials.also always on the look out for more old wooden thread display boxes,the thread safes used to be really cheap now they can get big buck$ for them.

Rod building and tackle tinkering is suppose to be fun,some of the best rods I've ever seen were made with the tools that fit in a shoe box.
When you get into micro managing you tend to loose the character of the piece.

Had a electronic micro scale my good friend gifted me,really liked the scale until it stopped working,went back to my old postal scale,it still works great for my needs,my triple beam hasn't been off the shelf in a very long time.

Like Tom says you can do it however you like,that's true of just about everything rod building.

I prefer to mix my epoxy by color when the color is right the mix is perfect. ;)

Tight Lines And A Stack Of Books,Tea Cup And Razor Blade Loops
Andy M


Top
  
Quote
Post 29 Jan 2020, 22:21 • #19 
Glass Fanatic
Joined: 02/27/16
Posts: 2334
Location: US-IL
Thanks Tom.I have A few repairs to make and a 6' Herter's that needs new guides.My first attempt at redoing guides.Yes i know ,people feel water based products are not as durable.I simply tell them that concrete is water based and has a decent track record,I can't even be in the same room with epoxy these days,I have fletched arrows with a special tape that works better than glue ever did.
Andy i thought your list would be pages,the sign of a true craftsman is doing more with less.I see the younger guys my son and nephews included,carrying so many tools with them that they don't really need.Youthful enthusiasm, having the newest cutting edge labor saver.


Top
  
Quote
Post 29 Jan 2020, 22:31 • #20 
Guide
Joined: 05/08/15
Posts: 115
Location: Victoria Australia
Thanks for your informative post Tom. Didn't realise that my Rabone calipers had a depth gauge as you so well illustrate in photos 7 & 8.


Top
  
Quote
Post 30 Jan 2020, 23:08 • #21 
Glass Fanatic
Joined: 04/26/06
Posts: 3837
Location: Northeast Of Heaven
Hello
Great Topic you started Tom,I really like your approach,it's fun to see what people from different backgrounds bring to Rod Making. By now I've met rod tinkers from just about every walk of life.
It's amazing when - a Plumber,a Carpenter Boat Builder,a Professor,a Prosecutor,a Chemist,a Judge,a Trout Bum,a Metallurgist,a Archeologist,a Whom Ever - all have fishing and rod tinkering in common.
It's one of the things I learned as a young kid sitting around the camp fire with my Dad and his pals.

From the early age of 8 until about 12,Tinkered up my first 6 rods,back then Used a stack of books for tension,McClains was the foundation,a discarded double edged Razor blade,a Tea cup to keep the spool of thread from rolling across the floor,Scotch tape,a red pencil for guide spacing and placement,Moms Yard stick,a spool of Twine,10 cent paint brushes from the drug store,whatever Varnish or other stuff like sand paper I could scrounge from the boat house,head cement,plyabond cement,lots of plyabond.

When I was 13 Mom and Dad gave me a Herters Rod building kit for my birthday, The kit came with a thread tension device,thread,color preserver or should I say "color fixative",Rod Varnish, some other small hand tools,brushes,a pamphlet how to wrap a rod,The Rod Blank was a 7' Herters Spinning rod with a assortment of guides and tip tops,Also was gifted a copy of George Herters book with
.
"The Secrets Of Fishing Rods and How Fishing Rods Are Made".
The Most Important Rod Making Tools I Have Ever Owned Period.

That was it from that point on the obsession had it's foundation,some kids hung around the pool halls,I hung around the tackle shops,and rod shops.

Spent the last 4 days getting stuff together to sell off,I'm going to the C.F.F.A. Expo this coming Saturday.
Really went deep into my rod quiver this time,also my hoard of materials.
I'm ashamed to say that some of my stuff had to be thrown out,also some of the stuff I had no recollection of,it was like seeing some stuff for the first time.

Anyhow I took some pictures to share with you here of some Rod Shop Goodies.

Tight Lines And Keep It Simple Loops
Andy M
Image
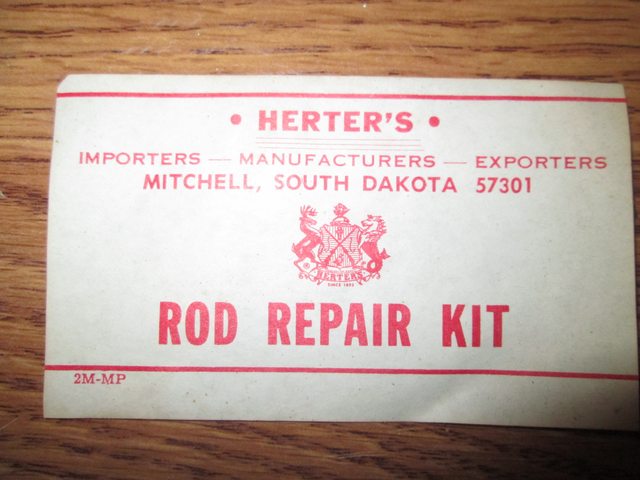
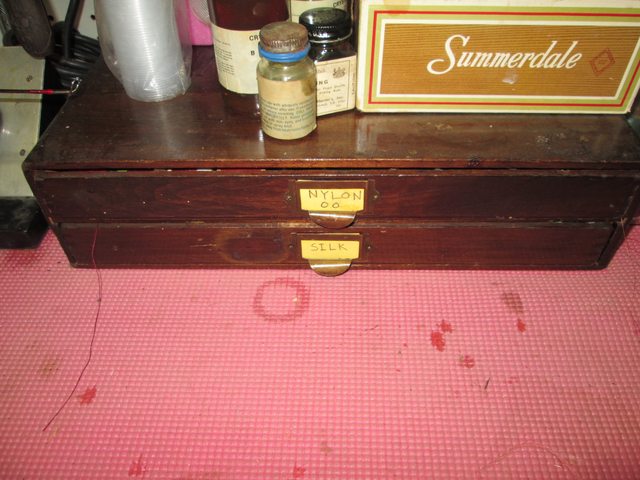
Could Only Save The Label Mice Ruined The Box.
Image
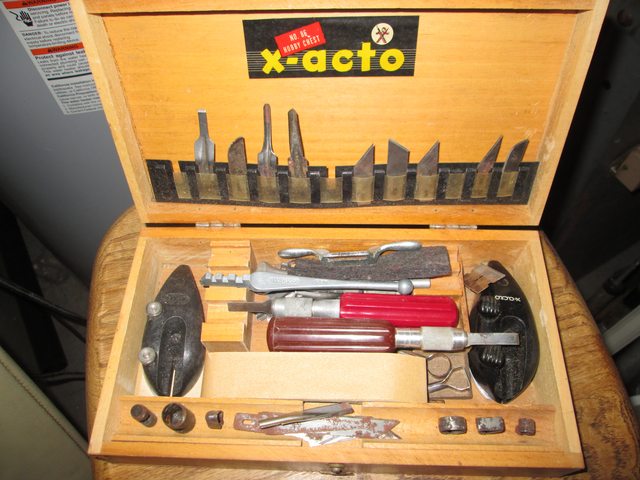
Ferrule Sizing Gauge,Large Spool Thread Storage Box.
Image
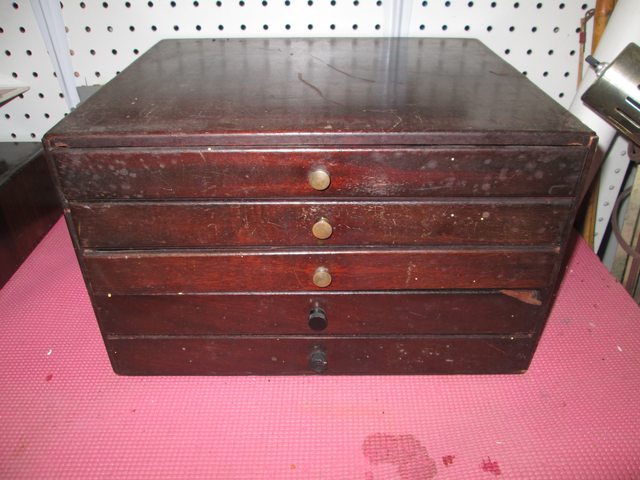
Great To Keep On Hand.
Image
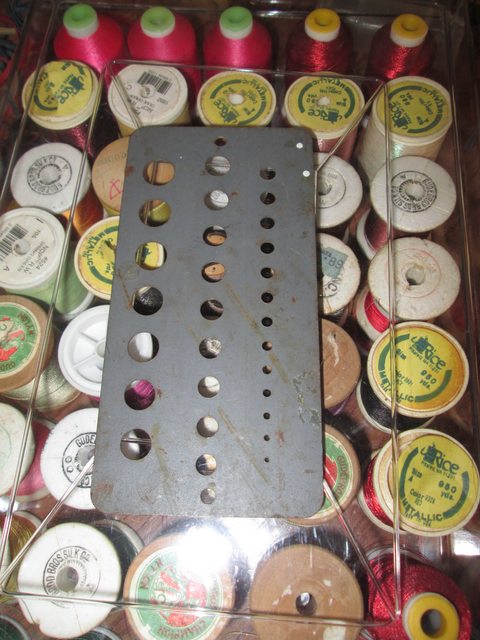
Silk Thread Storage.
Image
More Thread Storage.
Image
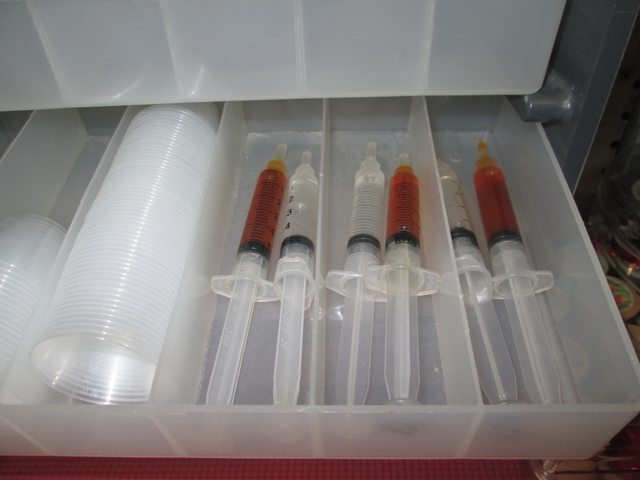
Loaded Syringes Of L.S. Supreme
I was only kidding when I commented that my mixes are formulated by color.
The epoxy mixture methods I use will remain my secret.
My recommendation however is to always follow the manufactures recommendations/instructions,If you have a problem/issue the best course of action is to call/contact the manufacturer,they always have technical help experts on hand to assist you.They can also possibly give you some tips to get the best results using their products. ;)
Image
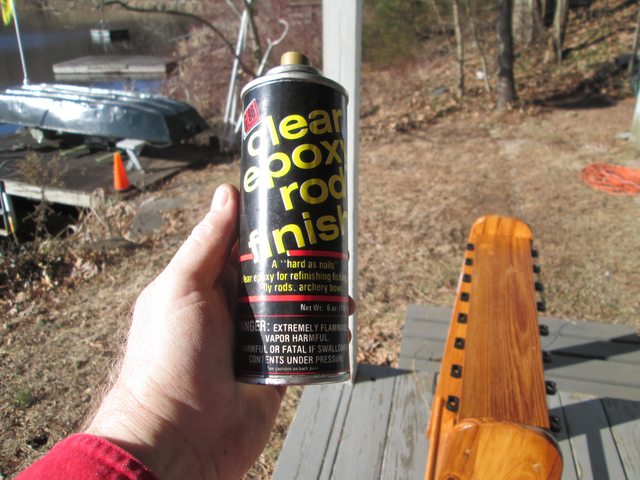
One of my rod racks got left out in the Car Port,it was looking weathered,I have a couple of cases left of the 1970's Rod Spray On Epoxy,Wouldn't Dream of using it on a rod but when it came to a rod rack why not right.
Well I gotta tell you the stuff went on slicker than grease and looks amazing.
When this stuff cures in 5 Min it's as the can says hard as nails.
Image
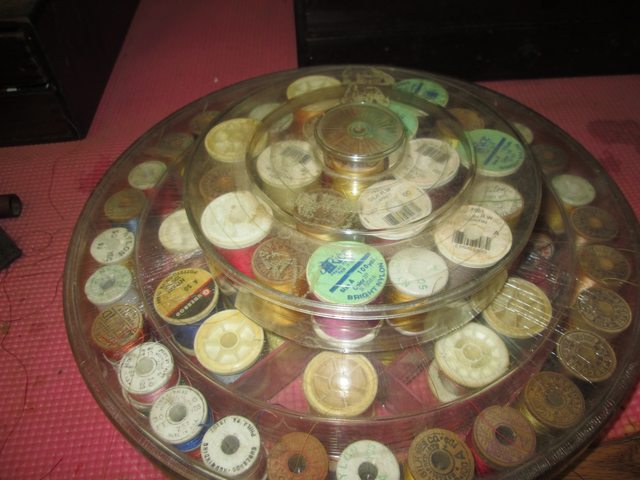
Plastic Thread Carousel.
That's All For Now Folks.


Top
  
Quote
Post 31 Jan 2020, 16:39 • #22 
Master Guide
Joined: 12/19/07
Posts: 398
Location: US-MI
Can I just add.
A pair of dividers. They are the easist thing for measuring wraps. The next best thing is a hem measuring tool from the fabric store.


Top
  
Quote
Post 06 Feb 2020, 10:32 • #23 
Glass Fanatic
Joined: 02/12/16
Posts: 4106
Location: USA-CO
I want dial calipers in the worst way, but good Starretts, Mitutoyos etc. cost upwards of a hundred bucks. I got some digitals, and they've gone for 6 years on the original battery. They came with a spare battery to boot.

Over-reaming grips bedeviled me, and it mattered not that I measured things precisely. My issues stemmed from trying to get rid of the high spot, or node where the slopes from reaming with a tapered reamer from both ends meet. A round file would enlarge the ends no matter how hard I tried.

Rooting around in Woodcraft one day, I saw some tubular sanding devices with a quarter inch I.D. Hmmmm, I thought -- I could glue one of those to a piece of dowel rod, chuck it into a drill, and sand the interior of a grip without touching the ends with anything more abrasive than smooth Maple. This is what I now use after reaming:


I just run it around in there, checking fit periodically, until I get a good fit. It has worked well.


Top
  
Quote
Post 12 Feb 2020, 19:45 • #24 
Sport
Joined: 12/07/11
Posts: 78
Location: US-GA
bulldog1935 wrote:
(the phosphor-bronze sheet was cut with a hand press-brake)
Image


BD, could you add a few words to that for me … I know what a metal brake is, but not familiar with one that also cuts … ?


nunc


Top
  
Quote
Post 12 Feb 2020, 21:18 • #25 
Piscator
Joined: 08/10/05
Posts: 19109
Location: downtown Bulverde, Texas
here's a combination forming and shearing press-brake - it's the same operation, just depends on the die and how far you press.
Image
The hand shears work the same way and accomplish the same result (slowly) - a very straight cut slowly chewing your way up the sheet, because of how they keep the workpiece positioned.
And of course the point of my post was the bending pliers.


Tomah wrote:
I want dial calipers in the worst way, but good Starretts, Mitutoyos etc. cost upwards of a hundred bucks. I got some digitals, and they've gone for 6 years on the original battery. They came with a spare battery to boot.....

think I paid $40 for 4" Starrett dial caliper from a gunsmith supplier, maybe Midway, maybe Brownell - probably on sale.


Top
  
Display posts from previous:  Sort by  

1, 2  Next New Topic Add Reply


Who is online

Users browsing this forum: No registered users and 15 guests


You cannot post new topics in this forum
You cannot reply to topics in this forum
You cannot edit your posts in this forum
You cannot delete your posts in this forum

Jump to:  
Google
Powered by phpBB® Forum Software © phpBB Group