It is currently 20 Apr 2024, 06:00


New Topic Add Reply
Author Message
Post 23 Dec 2019, 14:11 • #1 
Glass Fanatic
Joined: 03/16/08
Posts: 3543
Location: Upstate-NY
I just finished making a 6'8" one-piece #4 solid wood rod.
Pics of the finished rod can be viewed here:
viewtopic.php?f=8&t=67795

This thread will be a photo documentation of the build process, for those who are interested.

After some research, I settled upon using American Beech as the wood species.
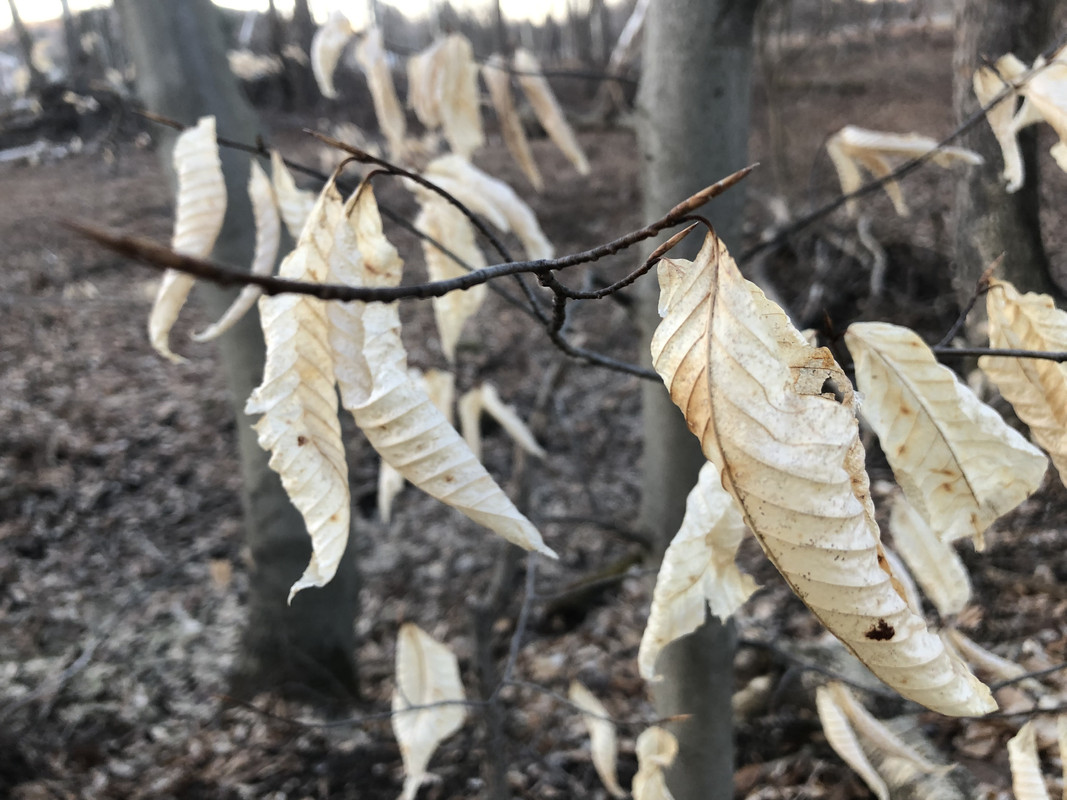
Beech trees are identifiable by their very sooth, grey bark; and also in Winter they retain their yellow-tan leaves, and exhibit brown-reddish pointed "shoots" on the ends of their twigs:
Image

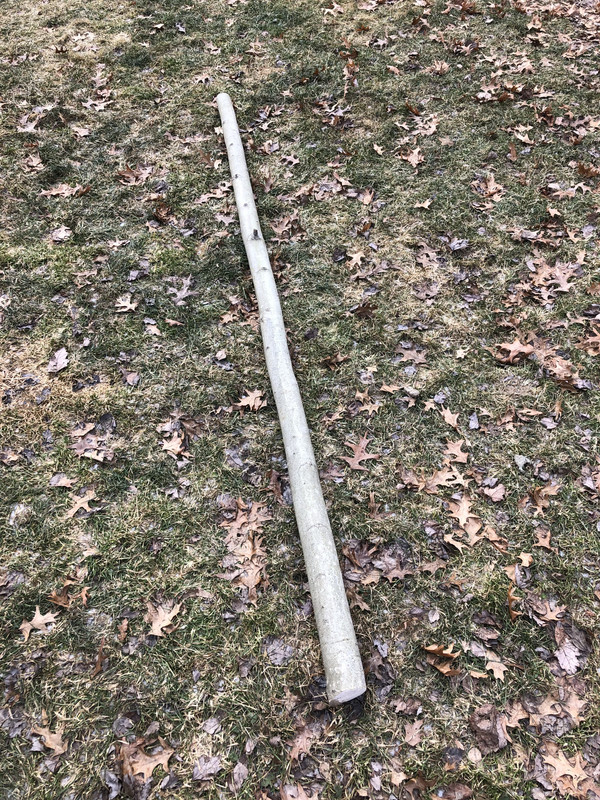
A harvested young Beech tree trunk. Early-on I was advised to not use the center of the trunk (the "pith"?) as this isn't strong-grained material. So the target size was a tree small enough to easily work with, but large enough in diameter to split a usable section from the "good part" of the tree - about 3" caliper. Also selected for straightness and limited branches/knots in the trunk, as these will affect strength of the fly rod blank:
Image

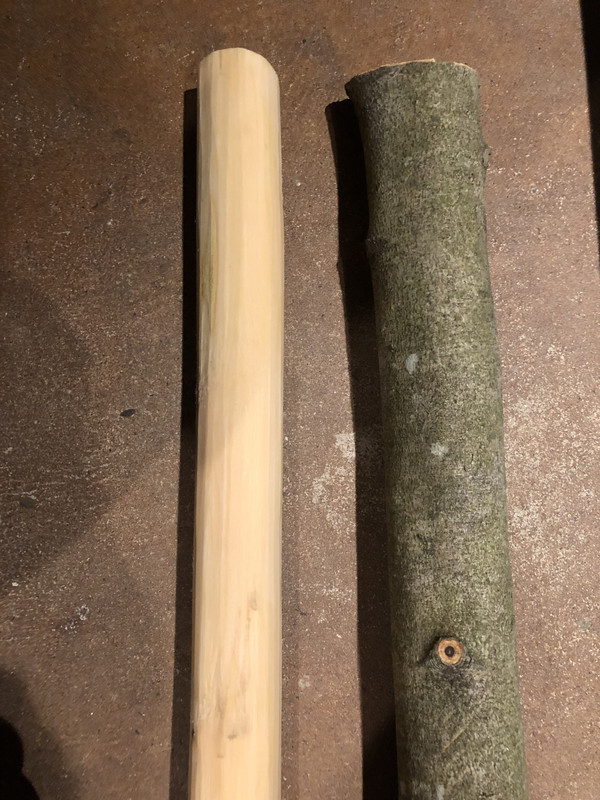
First step: get the bark off the wood.
Image

Here is a comparison of a natural Beech trunk next to one stripped of its bark:
Image

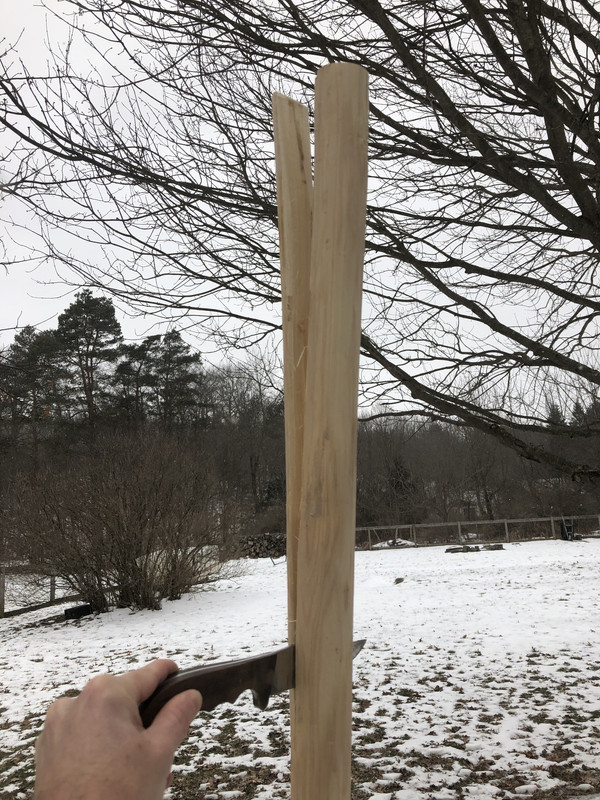
Next step: split the trunk into a length that is at least 1.5" in diameter, considering the handle and reel seat would be carved from this solid length, and there is a fair amount of "waste" to be accounted for while planing-off the material to get down to a straight, tapered blank:
Image

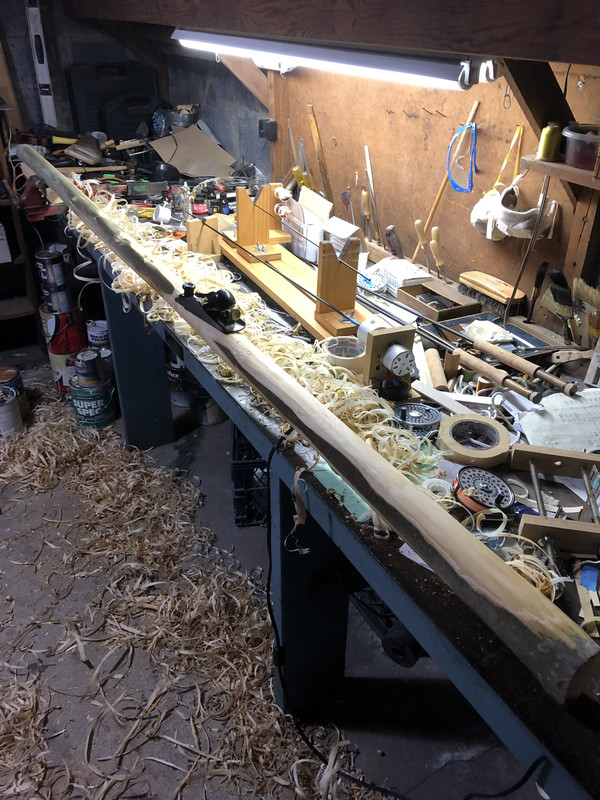
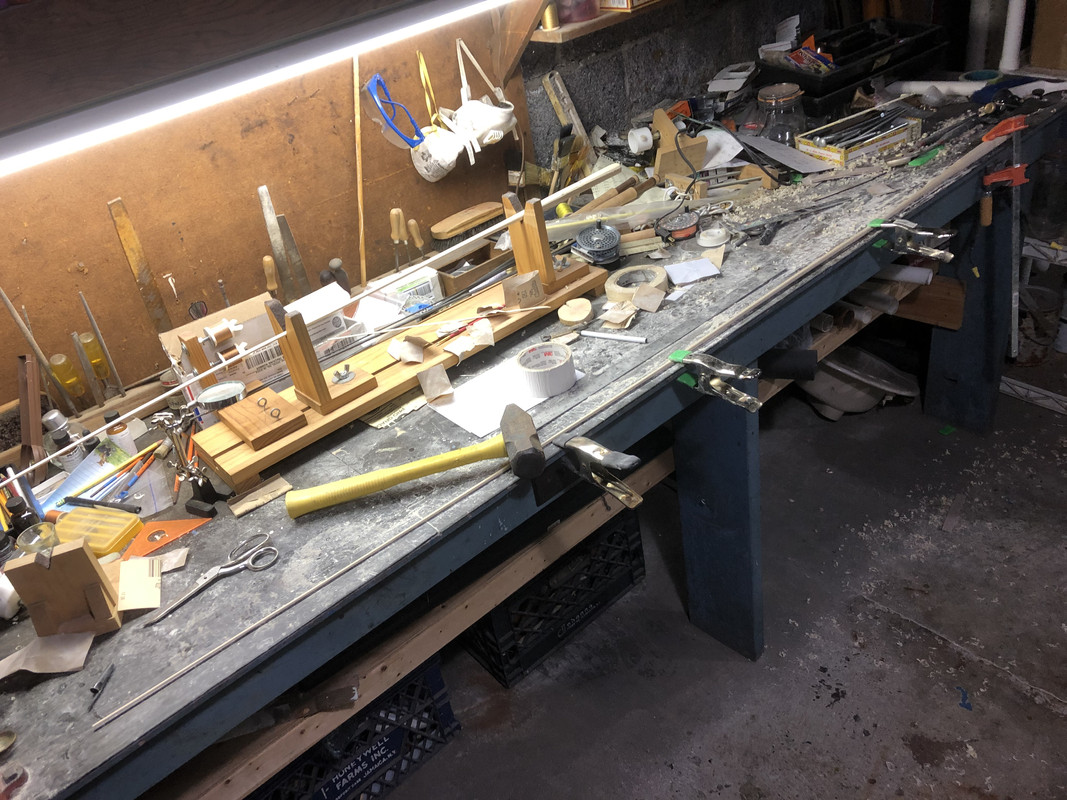
Then the rough-planing begins. I clamped the gnarly split length down on my workbench and carefully planed it down, rotating it around incrementally as I worked, always trying to keep the result "straight" (not easy!)
Image

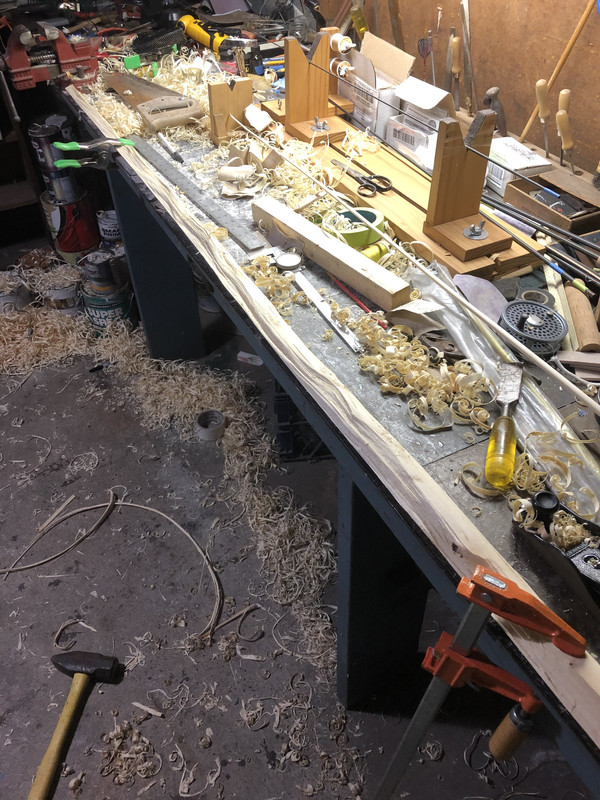
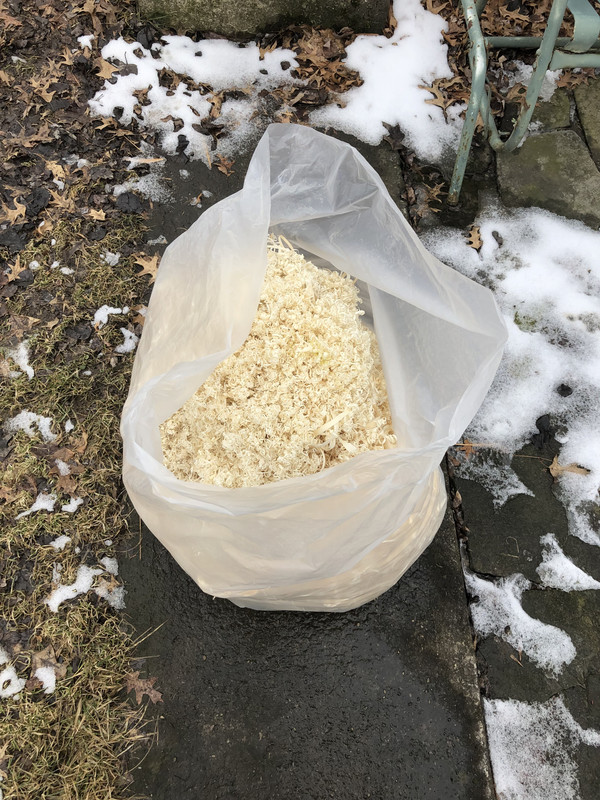
That's a LOT of shavings! Next time I won't be so conservative, and may split a bit thinner raw blank to start with:
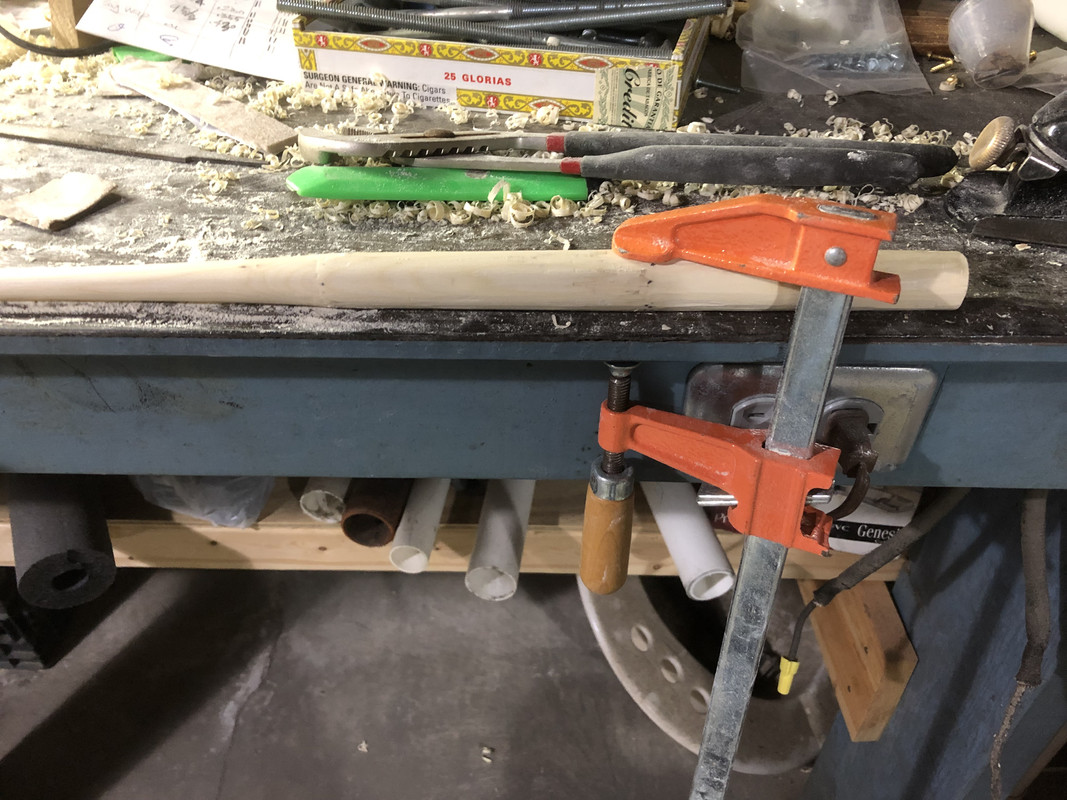
Image

Tapering down:
Image

The formation of a rough handle and reel seat:
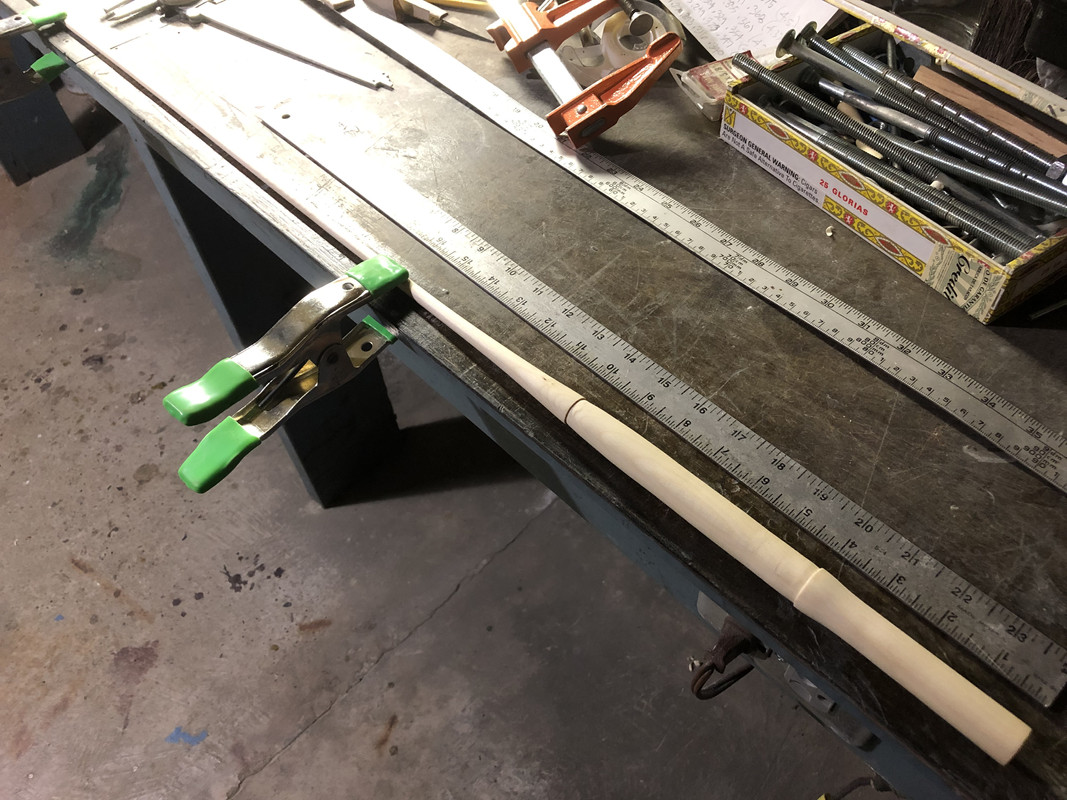
Image

Taper:
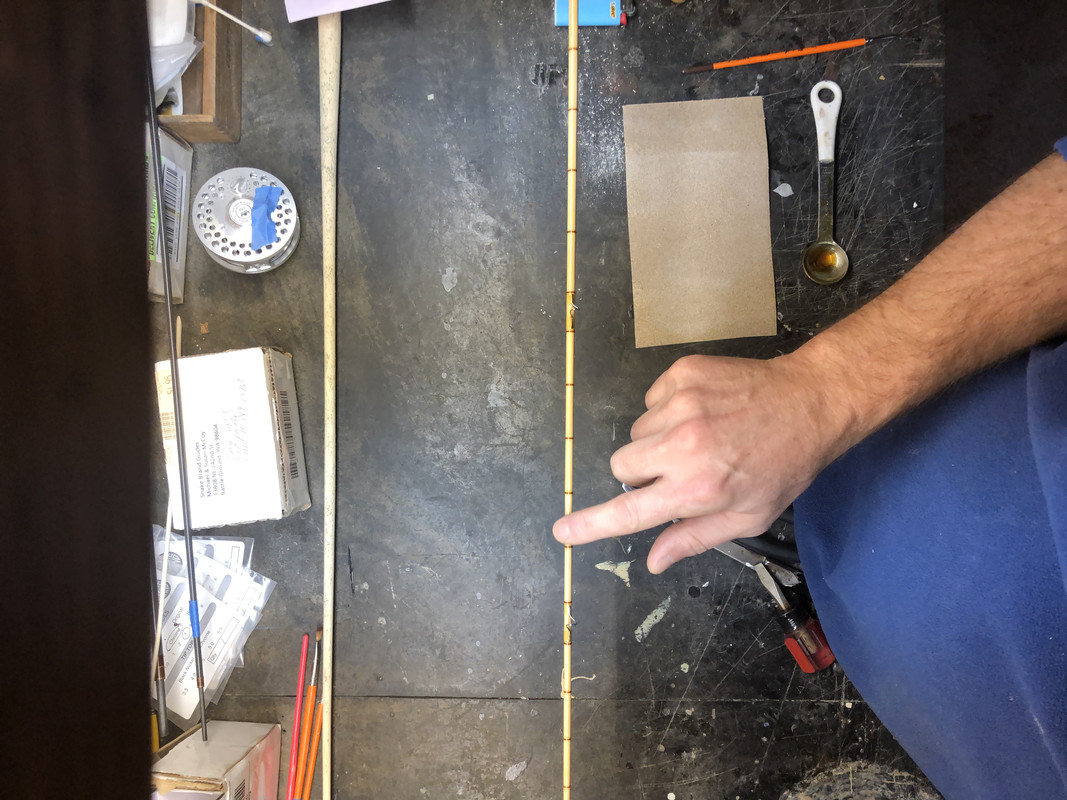
I used the hexrod.net “taper generator”. Because this was my first wood rod, and I wanted to stay conservative, I opted for a “straight” taper thinking it would produce the most uniform stress on the blank under load. Also being conservative and fearful of breakage, I started with the largest tip diameter I could also purchase a tip top that would fit (size 7.5 or .115” ). From there, I used that .115” tip as a starting point (and constant) to generate the taper. The other variable in hexrod is the “Rod taper in 1/1000-ths per linear unit:” I started conservatively with a 4.5 value which produces a med-fast taper in a bamboo hex rod. I taped-on some guides and test-cast. The rod was too stiff for my liking with this 4.5 value, So I sanded the blank down some more using a 4.25 value. Still too stiff. After some more trial-and-error I finally settled on 3.75. With its relatively thick tip the final action is “semi-parabolic” which I am quite happy with. With hexrod being geared toward bamboo, using it became only a loose guide to achive the lineweight and action I desired. A lot of trial and error and careful sanding was required to get what I wanted.

Eventually, once I got within .2"-.3" or so of final taper, then it was sandpaper and/or scraping with an x-acto blade to work down to final taper, and to carve-in a recess in the handle to accept the rattan grip, and mortise the bottom of the reel seat:
Image

Along the way, the taper was checked by taping-on guides and test-casting. I started off pretty conservatively, keenly concerned about strength of the material and hazards of taking a set or even breaking. So the tip was set at .115" - the largest diameter i could get a fly tip-top for, or size 7.5. Early tapers were too stiff/fast, so I successively re-calculated the taper via hexrod.net and reduced material (moreso from the but-end) to achieve a slower taper with a lot better "soul".

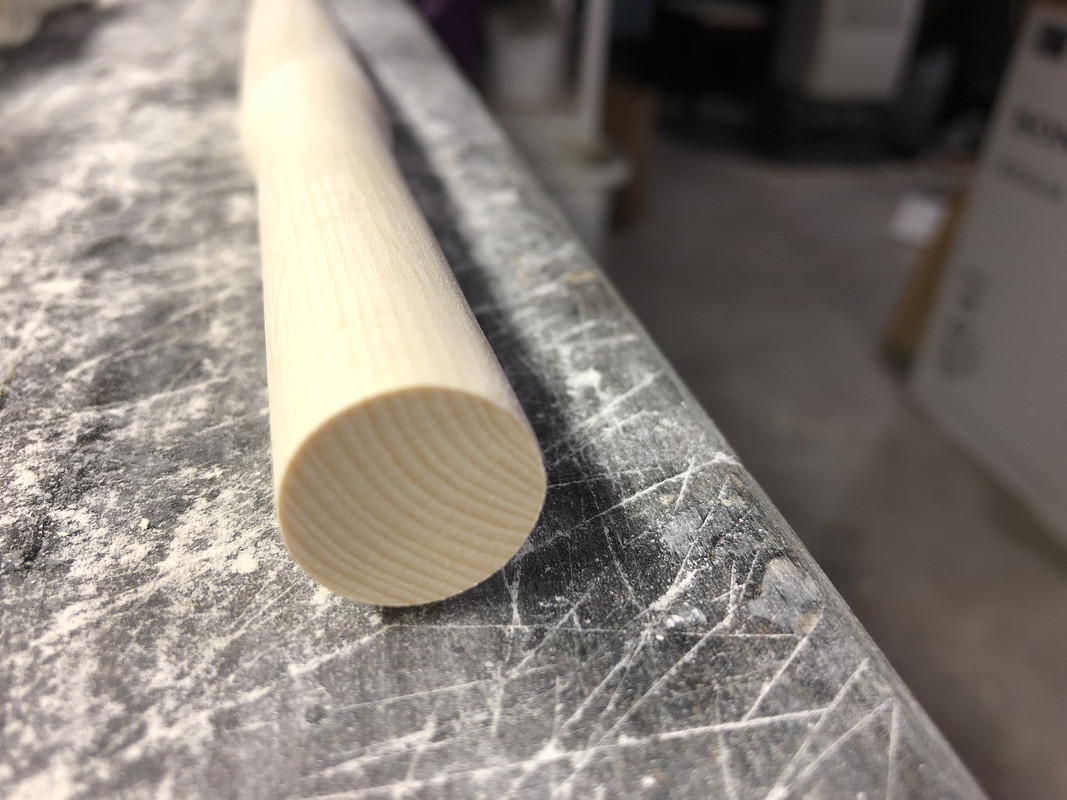
once I was satisfied with the taper, at this point, the blank was treated with pure Tung Oil diluted with Artist's turpentine. Three penetrating coats.

End-grain at the butt end:
Image

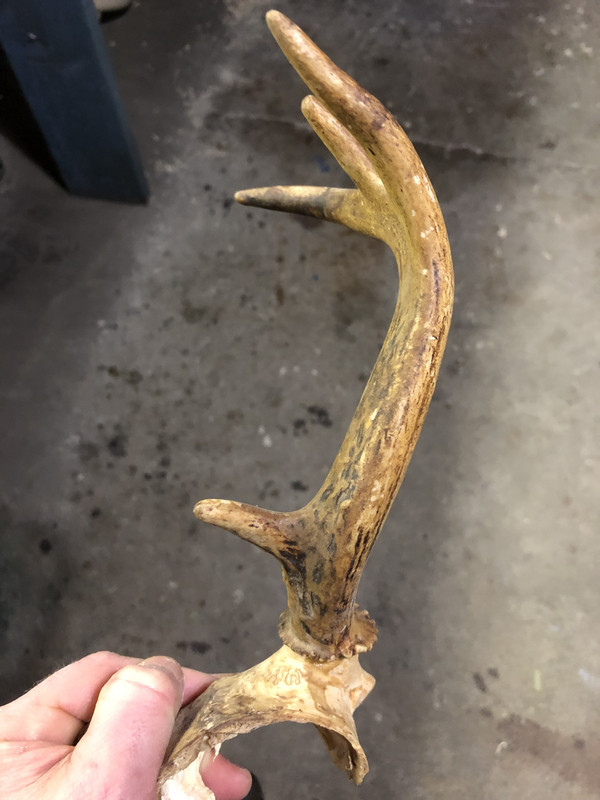
Deer Antler source material for the butt-cap:
Image

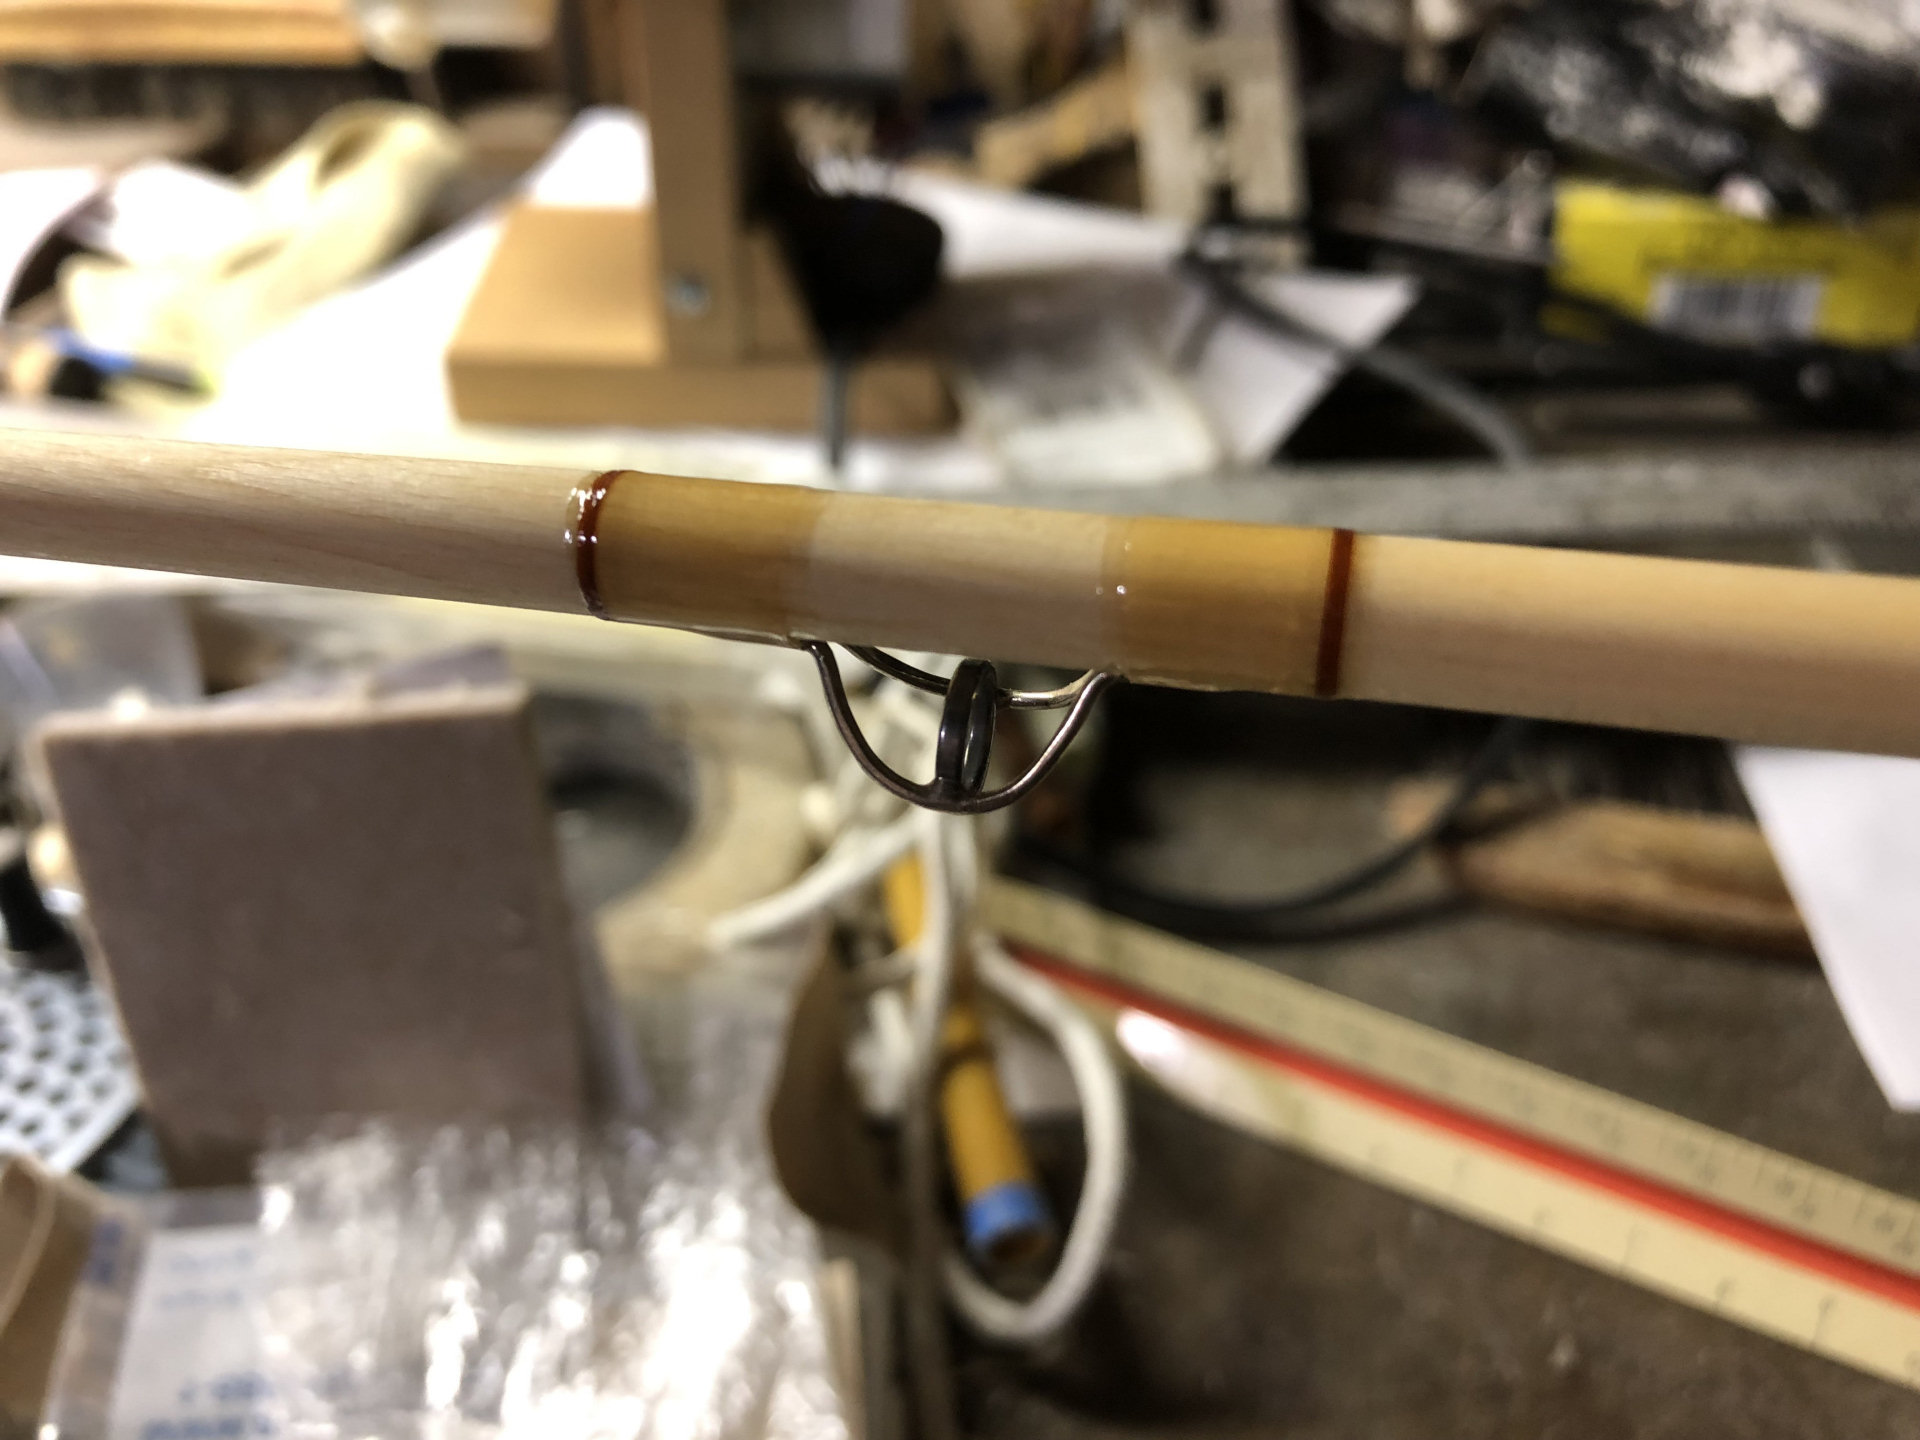
Silk guide wraps were finished in Spar Varnish 4 thin coats.:
Image

And the blank was final-finished with finger-applied Tru Oil, 3 thin coats:
Image

The nearly-finished rod, next to a raw Beech trunk like I started with:
Image

This was a very time-consuming, but fun and educational project. I am pretty happy with it.
I still have that other raw Beech trunk lying around, and may just go ahead and make another.


Last edited by corlay on 03 Jan 2020, 10:04, edited 1 time in total.

Top
  
Quote
Post 23 Dec 2019, 16:40 • #2 
Guide
Joined: 05/22/16
Posts: 160
Location: US-Eastern KY
Remarkable project ! Did you use the beech green or was there some drying/seasoning time involved before shaping and finishing?


Top
  
Quote
Post 23 Dec 2019, 17:41 • #3 
Guide
Joined: 09/04/13
Posts: 142
Location: US-MT
Outrageous and sublime...wonderful work...


Top
  
Quote
Post 23 Dec 2019, 20:31 • #4 
Glass Fanatic
Joined: 03/16/08
Posts: 3543
Location: Upstate-NY
cjtarbox wrote:
Remarkable project ! Did you use the beech green or was there some drying/seasoning time involved before shaping and finishing?


I debarked, split, and rough planed the wood “green”. then, I made a “drying tube” which was essentially a 4” diameter cardboad tube duct taped in front of a heating vent, which blew hot dry air over the rough blank for about a month.

Here’s a pic:
Image

Image

I have found some resources online of others who have made solid wood rods, and one guy heats his blanks to 400degrees. something about that temp altering the cell structure in the wood - similar to how bamboo rods are made. I did not do this.


Top
  
Quote
Post 24 Dec 2019, 08:27 • #5 
Glass Fanatic
Joined: 02/12/16
Posts: 4106
Location: USA-CO
Wow. Congratulations on a terrific project -- lots of inventiveness there. That first photo of your bench is priceless! Oh yes, I like the Marantz amp too...


Top
  
Quote
Post 24 Dec 2019, 09:02 • #6 
Guide
Joined: 07/13/16
Posts: 129
Location: US-MI
Thanks for the detailed update. An interesting process for sure. I can only picture the look on my wife’s face if she walked in to see a drying tube duct taped to a heating vent in our living room. Love it.


Top
  
Quote
Post 24 Dec 2019, 11:46 • #7 
Glass Fanatic
Joined: 03/16/08
Posts: 3543
Location: Upstate-NY
@Tomah: the Marantz is a really nice home theater amp/tuner, but it developed a bad circuit/short somewhere and wouldn’t sound clean without audio crackle until fully warmed-up. So it has been sent to pasture. Bought a new Yamaha to replace it. Bluetooth, Internet, DVI input, etc. Even though the Marantz sounded better, the modern features of the Yamaha are appreciated

@Vdub32: not my living room. Just my basement home-office. Wife would have never tolerated this silliness in our main living space. lol


Top
  
Quote
Post 24 Dec 2019, 17:55 • #8 
Glass Fanatic
Joined: 02/12/16
Posts: 4106
Location: USA-CO
corlay wrote:
@Tomah: the Marantz is a really nice home theater amp/tuner, but it developed a bad circuit/short somewhere and wouldn’t sound clean without audio crackle until fully warmed-up. So it has been sent to pasture. Bought a new Yamaha to replace it. Bluetooth, Internet, DVI input, etc. Even though the Marantz sounded better, the modern features of the Yamaha are appreciated...


Find a vintage audio repair specialist and get it fixed. Likely just a capacitor or two gone short or maybe a transistor with leaky junctions. There's nothing like that sound.


Top
  
Quote
Post 24 Dec 2019, 21:00 • #9 
Glass Fanatic
Joined: 05/22/16
Posts: 1769
Location: SJC
That's an interesting project !

Can't resist asking about your futon frame too, since I'm looking for a new one, after my condo gets renovated (water leak/damage). I had an old metal one that broke, and for years I'd resorted to putting books under it and bracing it with metal wire before finally getting it hauled away. I want to get a more solid one this time.


Top
  
Quote
Post 24 Dec 2019, 23:52 • #10 
Glass Fanatic
Joined: 07/05/10
Posts: 5229
Location: Mid Hudson Valley of New York
Great post/pics, interesting project. Terrific outcome. That must be a labor of love. And all done with hand tools. Nice work.


Top
  
Quote
Post 25 Dec 2019, 12:18 • #11 
Guide
Joined: 08/19/16
Posts: 314
Location: Brazil
Congratulations for a job well done of building your beech-wood rod. When first viewing the photos, some details got my attention.

First of all, there are quite a few intermediate wraps, which must not be merely decorative. Is that possibly to minimize splitting? Another thing that really caught my eye is the tip-top, which looks different from what one would usually see on a fly rod. What kind of tip-top is it?

Also, when first looking at the rattan grip and wooden reel seat, I wondered whether that unit was made separately from the rest of the blank, due to a different color on the reel seat. But upon seeing the picture book, that became more clear. Some say that using wood to make a grip and reel seat makes for more sensitivity than cork, but since the entire rod is wooden in this case, it would probably be rather difficult to compare. Do you have any insight on this?

Finally, I have long admired the possibilities in split bamboo rod making, because so many different tapers are available, and even they can be tweaked according to one’s needs or desires. That is totally different from building with fiberglass or carbon fiber, where most builders can only finish a blank that has already been built, doing little to alter the action. Making a rod out of wood with no previously determined taper should give you an intuitively better understanding of rod design.

Building rods out of wood is an art that has been practically dead for many years, so you deserve thanks for bringing the craft back, at least for a short time.


Top
  
Quote
Post 26 Dec 2019, 09:19 • #12 
Glass Fanatic
Joined: 02/26/14
Posts: 3586
Location: US-MN
Very cool project!


Top
  
Quote
Post 26 Dec 2019, 18:40 • #13 
Inactive
Joined: 02/16/14
Posts: 618
Location: Roanoke, VA
High five, impressive project. Can't wait for fishing pics.


Top
  
Quote
Post 27 Dec 2019, 11:09 • #14 
Glass Fanatic
Joined: 04/12/07
Posts: 1296
Location: western Massachusetts
Yes, you will have to tell us how she fishes, and do you really need those intermediates to ensure blank integrity?
I always thought intermediates were needed when they went to split bamboo tips because the glues were not trustworthy?
Nice experiment!


Top
  
Quote
Post 27 Dec 2019, 12:02 • #15 
Glass Fanatic
Joined: 03/16/08
Posts: 3543
Location: Upstate-NY
PampasPete wrote:
First of all, there are quite a few intermediate wraps, which must not be merely decorative. Is that possibly to minimize splitting?


My thoughts on the intermediates are twofold: 1) they sure look nice! 2) I think they should impart some additional strength to the blank, be it to prevent splitting and/or give the blank some additional reinforcement.

PampasPete wrote:
Another thing that really caught my eye is the tip-top, which looks different from what one would usually see on a fly rod. What kind of tip-top is it?

Just a normal Pac Bay fly tip top, size 7.5.

PampasPete wrote:
Some say that using wood to make a grip and reel seat makes for more sensitivity than cork, but since the entire rod is wooden in this case, it would probably be rather difficult to compare. Do you have any insight on this?

When you think about it, cork is very comfortable but also a "damper" with regard to the transmittance of vibrations.
Yes, this solid-wood construction of all wood, with a thin rattan wrap for the handle will transmit much more "fighting fish feel" to this rod and I really look forward to that experience.


Top
  
Quote
Post 31 Dec 2019, 17:47 • #16 
Master Guide
Joined: 09/23/18
Posts: 616
Location: Eastern Wa
This blows me away. Thank you. Looking forward to seeing your first fish on it and impressions!


Top
  
Quote
Post 03 Jan 2020, 09:56 • #17 
Glass Fanatic
Joined: 12/31/15
Posts: 1248
Location: Northern Rockies
This is really awesome. I can't say how impressed I am. Well done, and thanks for sharing the whole process too. It's fascinating to see it develop.

And definitely pass on the pictures when you get it on the water.


Top
  
Quote
Post 11 Jan 2020, 15:45 • #18 
Master Guide
Joined: 03/09/15
Posts: 685
Location: Arkansas
Great work. Love it.


Top
  
Quote
Post 01 Feb 2020, 20:22 • #19 
Glass Fanatic
Joined: 03/16/08
Posts: 3543
Location: Upstate-NY
thinking about it...

Image

split my other “backup log” harvested last winter along with the one I used to build the 6’8” rod. WAY HARDER to split when not “green” I realized. If this Split seems viable, I plan to make a shorter 5’9” #3-4 one-piece rod for tiny brookie waters.


Top
  
Quote
Post 02 Feb 2020, 12:32 • #20 
Guide
Joined: 12/20/18
Posts: 204
Location: Yorkshire
Amazing and inspiring work. Have you finished/fished it yet corlay? Is it much heavier than a comparable bamboo rod?
matt


Top
  
Quote
Post 03 Feb 2020, 10:38 • #21 
Glass Fanatic
Joined: 03/16/08
Posts: 3543
Location: Upstate-NY
mrhoogly wrote:
Have you finished/fished it yet


Finished - yes, fished - no.
Will get it out on the water in April...

mrhoogly wrote:
Is it much heavier than a comparable bamboo rod?


Surprisingly - no. Not really.
What is interesting about this rod's balance is because the grip/seat are solid wood,
it is naturally "butt-heavy". So, for the balance I like (an 1" or so above the top of the grip...)
I actually mount a pretty light reel on it. Was expecting to need a fairly heavy reel to balance a solid wood rod - not so!

But overall, it does not seem too much heavier than a bamboo rod. The short length helps, or course.
I'd say this 6'8" #4 solid wood rod feels like a 6'8" #6 bamboo rod, and far as "heft" goes.


Top
  
Quote
Post 04 Feb 2020, 07:18 • #22 
Guide
Joined: 12/20/18
Posts: 204
Location: Yorkshire
cool, thanks. look forward to some fishing photos!


Top
  
Display posts from previous:  Sort by  

New Topic Add Reply


Who is online

Users browsing this forum: No registered users and 14 guests


You cannot post new topics in this forum
You cannot reply to topics in this forum
You cannot edit your posts in this forum
You cannot delete your posts in this forum

Jump to:  
Google
Powered by phpBB® Forum Software © phpBB Group